Why You Can’t Stretch Your Way Out Of Pain

why you can't stretch your way out of pain

Acknowledging bias in our lives is always a good first step toward healing. Yoga teachers and practitioners have long held the belief that if something didn’t feel good in our bodies we could stretch our way out of the problem. I certainly thought that way for many years, particularly around my own back pain. Yet no matter how much I stretched, it didn’t ever seem to get better. I inadvertently realized the error of my ways when I started getting into hiking and began to develop more strength in my legs, hips and core as a result of scaling mountains with a backpack regularly. My back pain started to get better over time and I started to wonder if my hiking had something to do with it. I finally started to put two and two together when I started approaching my yoga practice in a way that incorporated strengthening actions along with the stretching I knew and loved. When I began to understand that the way I had approached yoga in the past had an inherent bias toward stretching and range of motion, and I began to balance that with strengthening actions within the practice, my body responded with less pain and more range. If you’re struggling with pain in certain areas of your body and stretching doesn’t seem to be changing it, here are some things to consider to bring balance to your body and your yoga practice.

Imagine that your muscles are like rubber bands for a moment. Let’s take your arm as an example. Your biceps and your triceps are on opposite sides of your upper arm. When your biceps contracts, your triceps has to lengthen. That’s a really good thing or you wouldn’t be able to bend your elbow! That muscle needs the ability to lengthen (aka stretch). But consider what would happen if your biceps didn’t have the ability to strongly contract. Imagine it was like a rubber band that had lost its spring. You still wouldn't be able to bend your elbow because it wouldn't have the strength to contract enough to create the movement. We might think of this as the muscle being “too long”.

Now imagine it the other way, which is what we often seem to notice the most in our bodies, especially if we’re dedicated yoga practitioners. Imagine you are trying to bend your elbow and your biceps is contracting, but your triceps is SO strong it can’t lengthen to allow the movement to happen. Now we have a situation where the muscle is “too short” or the sensation we often label as “tight”. Thinking about these two opposites starts to allow us to understand why this balance is important.

Another way to think about this - imagine a suspension bridge like the Golden Gate in San Francisco. The cables have to have just the right amount of length and strength to allow the structure to be stable while also allowing for movement. You probably don’t (want to!) think about it when you’re driving over such a bridge, but there are constant small movements due to weight of vehicles, wind speeds, temperature changes, (god forbid) seismic activity and other factors. Our muscles are similar in our bodies, giving stability to our underlying structure but also allowing for movement.

But with the human body there is one more curveball that we also have to consider. Muscles can be tight without actually being strong and they can be long and still be tight. To understand this, consider the person that spends hours a day hunched over a laptop. They might look something like this most of the day:

muscle imbalance.png

The body and the muscles are being held in a certain position for extended periods of time. Over time the muscles on the front side of the are being held in a shortened position. They aren’t actually being asked to contract and so they tend to become weak, but they stay shortened and therefore may be perceived as tight. On the other side, the muscles are constantly being stretched, or held in a lengthened position. They can’t possibly contract for many hours a day to counteract the position in which they’re being held, so they are long but are very weak from being over stretched which may be perceived as tightness. These positions of holding when repeated over time tend to bring about this chronic state that may be experienced as painful. An imbalance forms that won’t be helped by simply stretching, particularly for the muscles that are already too long.

These examples are a simplification and a model for a VERY complex system, but hopefully you get the general idea here. Constant stretching of muscles isn’t good, constant contraction of muscles isn’t good. We need muscles that can contract well and lengthen well. We need balance between the two. Without those two things in balance, we may experience pain.

Yoga does mean union after all so is it any surprise that creating balance between length and strength should really be our goal?

So what does this mean for our yoga practice?

The bias of yoga asana, at least the way that its been taught historically, is toward creating length and range of motion. Again, these are good things to have, but yoga can also help us build strength if we approach it a little differently. One way to do this is to engage a muscle at its end range of motion.

For example, let’s take pigeon pose. We might typically think of this posture as a hip opener (aka stretcher), particularly because of the way it may create a sensation of stretch in the hip flexors of the back leg and the rotational muscles of the hips in the front leg. For many people, finding their way into this posture brings them to that end range or maximum range of motion for several muscles. That’s not a bad thing. But now, once at that end range we can ENGAGE and create strength over time by pressing the back leg down and forward and the front leg (shin) down and backward. The legs won't actually move from the shape you’ve put them into, but the muscles will contract and create strength by doing so over time.

Engaging at End Range of Motion.png

The overall effect is that the muscles will, over time be able to move through a full range of motion while also maintaining their strength. That brings us to our ideal state. (In a perfect world anyway. Again this is a complex system.)

Notice that I keep using the words “over time” here. This is not an instantaneous change. It takes constant attention and constant practice.

One last quick note about those long and tight muscles - when we start to address this imbalance it can be challenging. In the example above of our laptop user, if she decides she wants to start to strengthen that back side of the body that is overly long, weak and tight, she may run into one big obstacle, a sometimes painful cramp. 😣 This shows up all the time in the hamstrings for many yoga practitioners in postures and actions like this:

strengthening action for the hamstrings.png

I’m hugging the heel of the back foot toward my buttocks without using my hand or a strap to do so. That asks the hamstrings to contract strongly and that’s often where the cramp happens. If that happens to you don’t give up! Go a little easier the next time around and increase the demand on the muscle(s) that are cramping over time. They’re basically telling you (rather loudly) that they don’t have the strength to do what you’re asking them to do just yet. It’s really something you have to build up to and takes a bit of patience.

I hope this starts to give you some ideas about how to bring more balance between stretching and strengthening into your yoga practice. Strength training outside of yoga certainly isn’t a bad idea for most bodies, but we CAN create more strength and stop worshiping at the altar of range of motion in our yoga practice if we simply bring more balance to our actions. A pain free, healthy and balanced body should always be our goal and bringing a greater focus on strength into our yoga practice can help us get there.
If you’d like to learn more about putting these ideas into practice, we’ll be working with the concepts here throughout the month of February in my Livestream and On Demand vinyasa classes as we always do. This month we’ll be specifically addressing the muscles surrounding the hip joint.

If You Enjoyed This Post You May Also Like…

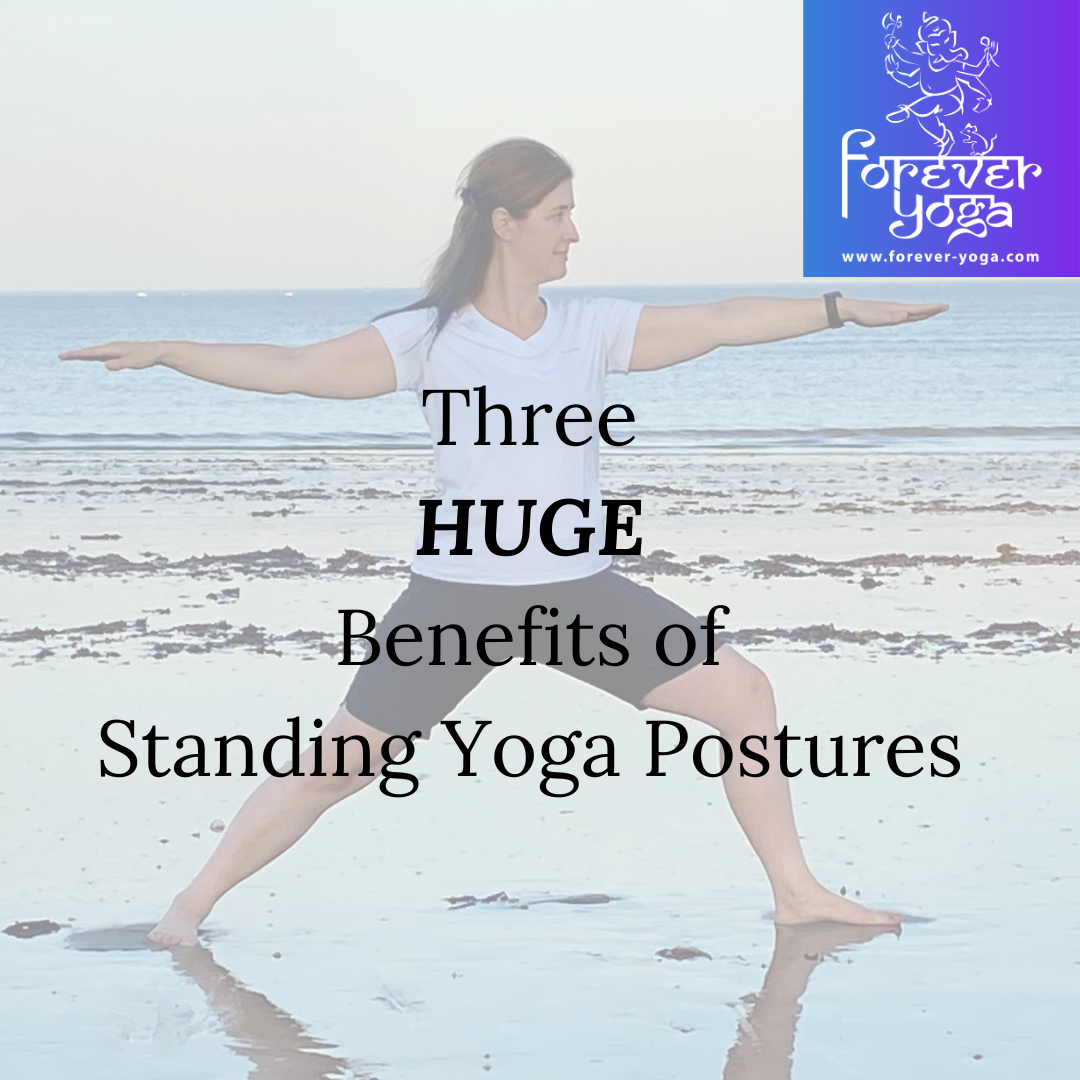
Three HUGE Benefits of Standing Yoga Postures

Three HUGE Benefits of Standing Yoga Postures.png

Standing yoga postures are some of the most often practiced yoga postures across many styles and traditions of yoga. But have you ever taken a moment to step back and wonder WHY these postures show up so much? I honestly hadn’t until recently, but when I did I realized they really offer us some amazing benefits when we give them the attention and focus they deserve. Here are three HUGE benefits of these yoga poses and some ideas that might help you bring them into better focus and appreciation the next time you get on your mat.

Standing Yoga Postures Stretch and Strengthen Large Important Muscle Groups - Whenever you’re working in standing yoga poses you are either stretching or strengthening some of the largest and most important muscle groups in your body. These include all the gluteal muscles (did you know that there are three of them per side?), the hamstrings (there are three of them too!), the quadriceps (bet you know how many of those there are! 😉) and the calf muscles, along with some other smaller muscles that are in the same general neighborhood. Depending on the posture you’re doing, you may be flexing or extending key joints in the legs like your ankles, knees and hips helping them to move through their full ranges of motion.

Why is that important? If you’ve ever had the experience of being unable to walk without assistance you know why. The full functioning of our legs in our life is an essential key to a life well lived and part of what makes us fundamentally human. Think about how many things, both simple (getting to the bathroom) and more complex (getting around the grocery store to get everything you need from the top shelf to the bottom one), that you wouldn’t be able to do or would be extremely difficult without working legs. Certainly, many people overcome this obstacle in amazing ways, but if you have two functional legs this family of postures offers a great variety of benefits to keep them healthy and working for you for a long time to come!

Point of focus for practice: Cultivate a sense of the muscles of the legs engaging (contracting) in your standing postures. The ones that are in a lengthened position might build a bit of eccentric strength and the ones that are already stabilizing might build a bit of isometric strength, both of which are important and beneficial for many reasons.

Standing Yoga Postures Can Help Train Your Body to Balance - The standing postures that require us to stand on one leg are probably the most obvious that come to mind here, but if you’ve wobbled in your warrior or triangle pose you’ve actually experienced this benefit as well. Have you ever considered how incredibly quickly the messages between the sense receptors in your feet and legs have to travel to your brain and back to help you maintain your position in any of these postures? It’s so fast we don’t even notice it most of the time. The only time we tend to notice is when we DO feel that wobble happen. But here’s the great thing - those moments of wobble are creating experiences that train your body to respond and correct more accurately and more quickly by developing core strength, kinesthetic awareness and proprioception. It’s something that not a lot of people practice once they learn to walk. Living in New England, especially in the winter months, I really think of this as one of the greatest benefits of our practice. When you’re doing that winter shuffle to the car you have a much better chance of recovering if you start to slip than you would otherwise. That doesn’t mean accidents won’t happen, but it sure does stack the odds more in your favor!

Point of focus for practice: The next time you wobble and recover, instead of cursing yourself or getting frustrated for a weak moment, turn some gratitude toward your incredible body for being able to compensate and correct when needed. Then consider where it is you might need more engagement to help you maintain stability.

Standing Yoga Postures Can Make You Feel Grounded - Life has definitely shown us some serious challenges recently and a sense of not knowing when the next shoe might drop or the ground beneath us might shift again may still be operating in the back of our minds and hearts. [Incidentally, if that’s something that’s really bothering you, check out PSTEC to get some relief.] When we practice standing poses we have an opportunity to allow ourselves to make a deep connection with the steadiness of the earth beneath us through the parts of our body that were built for the job, our feet and legs! I’ll often draw your attention in class to rooting down into the earth through the feet before coming into a standing posture or again once you’re there. Have you ever noticed the rebounding effect that happens when you do so? There’s an amazing relationship there. You press into the earth and she gives you the energy and stability to grow and stand tall. That feeling and that relationship can’t be underestimated. The Warrior poses are called that for a reason! When you do them, you embody the strength of a warrior. That can be a great reminder of that quality existing inside of you when you’re feeling like anything BUT a warrior.

Point of focus for practice: The next time you come into a posture like Warrior 2, before you move into it, press down through the feet and see if you can feel that rebounding effect through your torso. It might be a sense of lightness or ease that allows you to float up rather than feeling like you’re trying to drag your torso away from the ground. You may also find you arrive in the pose with a greater sense of steadiness.

Not sure where to place your feet for your unique proportions or feel you could use more steadiness in standing postures? Join me for my upcoming workshop - Set Your Foundation: Finding Stability in Standing Yoga Postures.

Details and sign up here.

If You Enjoyed This Post You May Also Like…

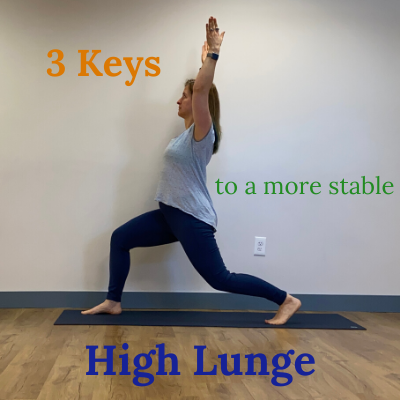
3 Keys to a More Stable High Lunge

3 Keys.png

“Weebles wobble but they don’t fall down!” was a clever marketing catch phrase from my childhood (oh Lordy am I dating myself now!) and something I’ve been known to say to encourage my students with a smile and a laugh when they’re having a hard time in balancing postures. One posture that this comes up in is high lunge. It’s a common posture in a vinyasa practice and can present some real challenges depending on where you find it in a sequence and how fast it flies by. But I’m here to help! Here are 3 strategies that might make this posture more stable (and even enjoyable!) for you.

1. Set yourself up for success by aligning your feet well. Foundation is always the first thing to consider in any yoga posture, and how you align your feet in this pose will either set you up for success or failure when you try to lift your torso.

Traditionally, if you’re standing in tadasana or mountain pose, you may have been taught to have your big toes touching and your heels slightly separated. While that may work for some bodies, including the traditionally slight statured Indian male, if you’re an American woman such as me, you may find this not only unstable but restrictive in your outer hips. Instead, take your feet farther apart. I usually say sit bones distance, which can be measured by taking your two fists between the arches of your feet. With that little bit of extra space, you’ll have created a broader foundation for whatever you build on top.

Now with that broader foundation, as you bend forward and step one foot back to prepare for high lunge, see that the foot that goes back stays in that same line. There’s a natural tendency for it to drift into the center of the mat a bit, so resist that tendency and keep the foot wide to the side. This way, when you come up into your high lunge you’ll have that broader base to support you and maintain stability.

2. Draw the torso up through center rather than forward and up. This is subtle, but this is an energy management strategy. If you try to reach your arms forward as you lift the torso your energy and your focus will move OUT rather that in and up. Think of it this way, if you wanted to shoot and arrow up into the sky you wouldn’t aim it forward first and then expect it to turn upward somehow. The same is true for the energy of lift that you’ll need to bring up your torso.

Instead, as you exhale (because breath is always a good part of any strategy in a yoga posture), draw your arms up through center as you lift your torso. You might imagine that as you start to lift you’re going to take your hands up from the ground bending your elbows to touch your outer hips first, then draw them along the sides of your torso and up to the sky. Your torso will naturally follow this movement and you’ll contain your energy output to move in the direction you want to move, rather than a direction that isn’t necessary.

3. Engage the muscles surrounding your outer hips. This is an area we don’t think about very much in daily life, but the group of muscles that surround your outer hips are so important to creating stability in any standing posture.

As you move into the pose, feel as if these outer hip muscles are squeezing in towards the center of your body and maintain that feeling as you hold the posture. It’s as if someone came behind you and placed their hands on your outer hips and gave them a hug. You can even use your own hands to create this feeling and notice if the muscles here are doing the work you’re asking of them.

Having a hard time connecting to these muscles? We’re working on strengthening and engaging this area in my classes all this month. Come in for a class or sign up for Digital Membership to learn how to engage and strengthen this important area of your body more readily!

If You Enjoyed This Post You May Also Like…

Finding Balance During the Holidays

Finding Balance During the Holidays.png

Been feeling a bit out of balance lately? Me too. According to Ayurveda, the sister science of yoga, we are well into Vata season which can make us feel a little bit spacey, dry out our skin, make our digestion a little questionable and leave us generally just feeling ungrounded. And it sure did seem to sneak up on us quickly this year! What’s worse, we know that the holiday season is close at hand and all of these things may get exacerbated even more by all the hustle and bustle and stress.

But Yoga and Ayurveda are here to help! Here are a few simple ideas to help you maintain balance (and maybe even your sanity) as the busy holiday season approaches.

The qualities of Vata are light, dry, rough, clear, active, cold and mobile.

The tastes associated with Vata are pungent, bitter and astringent.

These are the qualities and tastes that we want to AVOID at this time of year. There is a basic principle in Ayurveda that says Like Increases Like. If you remember that little catch phrase, you’ll know just what to do. Here are some examples relevant to the holiday season:

At a holiday party? Avoid the dry crackers and cold raw veggies. Now is definitely not the time for the salad! Head for the soup, especially if it has a root vegetable base. Warm mulled apple cider with some warming spices is a great choice for a beverage. Go easy on the alcohol, they don’t call it fire water for no reason! Find the items that are cooked, not super spicy, maybe even a little bit sweet and have some weight to them. Mmm… pumpkin pie…

Got a million family members to see? Try your best to not over schedule yourself. Can you spread out the merriment over the course of the holidays? Maybe you see Aunt Tilly at Thanksgiving, and then see Aunt Marge the week after. Or maybe you can even wait to see those friends you’ve been meaning to see until after the New Year. It will give you a little break from all the running around to recover (see active and mobile above) and prolonging the joy of the holiday season isn’t the worst thing in the world (providing you find it joyful, but that’s for another post).

Got some outdoor activities planned? Maybe you have a tradition of cutting your own Christmas tree or caroling with friends or family. Maybe you go for a hike on New Years Day. Great!! Just pay special attention to staying warm. Don’t forget to leave a good quality thermos with some of that hot cider or hot chocolate in the car for when you’re done and make sure you have a good layering system. If you’re like me and you always seem to have cold hands and feet no matter how good your gloves or socks are, consider picking up some chemical hand warmers or maybe even ask someone to get you a rechargeable hand warmer for a holiday gift or maybe even these reusable ones.

Outside of the days and times of celebrating, here are a few other ideas:

Maintain a daily routine - I find this one particularly challenging, especially with my all-over-the-place work schedule, but as I’ve been reminded lately, keeping some kind of daily routine is huge for balancing Vata. It really doesn’t have to be complicated. As I mentioned in this video, one thing I’ve implemented lately is a strict sleep and wake schedule. Just that little container for my day has made a huge difference in my energy levels in a short period of time. And hey, maybe that’s a good excuse to get out of that party you really didn’t want to go to a little sooner anyway ( What?! Don’t tell me you don’t have those! ;-) ). If you really want to go for it in this area you might investigate Ayurveda’s recommendations for a full daily routine.

Choose physical exercise that is slow and grounding - Yoga anyone? But seriously! Your yoga practice can either help relieve your symptoms this time of year or make them worse. If you always do a hot, fast paced practice it may be time to slow it down and cool it off just a bit. Maybe you add some strength training to your weekly exercise regimen (this is really never a bad idea at any time of year). Walking can be a great form of exercise and time in nature can be very balancing to Vata, but be sure you’re staying warm if you head outside.

Create a home environment that is soothing - The Danish concept of hygge was pretty popular a year or two ago and it still holds true for this time of year, especially in places like New Hampshire that are cold and dark. Light some candles, put on the big sweater, drink copious amounts of your favorite tea, turn off the TV, fire up the fire place and enjoy some coziness and warmth.

Up your self care game - This can be tough when we’re just SO BUSY and have so many things to do. But if you don’t fill your own cup you have nothing to give. Consider that what your loved ones really want is the best version of YOU this holiday season, and that isn’t going to be the you that is stressed to the max trying to make it all happen. Go get a massage. Book an acupuncture appointment. Shut the door to the office and do some Yoga Nidra. Take the time to read a good book for pleasure rather than study or research. Do what will nourish you the most and protect that time like you would any other important appointment.

If you want to learn more about Ayurveda and your own personal constitution I highly recommend taking the quiz on the Banyan Botanicals website (no affiliation, just love their resources). You’ll learn more about your particular make up and what may be out of balance for you right now. And if you find yourself really wanting to know more, head over to Amala Wellness and get a consultation with Susan Morgan, a real Ayurvedic practitioner in our area who can do a full evaluation and get you headed in the right direction for your own wellness goals and unique constitution.

I hope you found these ideas helpful! Did I miss something? I’d love to hear what you’re doing to keep yourself in balance during this busy time of year. Leave me a comment to let me know and share with our community!

If You Enjoyed This Post You May Also Like…

Why you might want to let go of that next Vinyasa...

Why You May Want to Let Go of That Next Vinyasa.png

If you’ve been to any vinyasa yoga class at our studio you have probably been reminded in one way or another that you can skip the vinyasa (that series of linked together poses that goes down dog, plank, chaturanga, up dog & down dog) at any time. Even though we often say it, you may wonder, what should you do instead? Child’s pose is often offered as an option, but have you ever thought about some of the many other options or why they might be more appropriate for you? In this post I’ll attempt to give you a verbal and visual guide to some options you may not have thought of when it comes to modifying this often found sequence of postures beyond just taking a break.

When thinking about how you might want to modify this sequence of postures, it’s good to think about your specific goals for your practice. It’s easy to get stuck on autopilot in anything that we do repetitively, and this sequence definitely shows up in so many public classes! When we can let go of our preconceived notions of what our practice “should be” and do what’s best for ourselves in a given moment in time, we are much more aligned with what it truly means to “do yoga”. One of my favorite definitions of yoga is that “yoga is skill in action”. By taking a small amount of time to know why we’re doing something, we’ll be all that much more skillful in our outcomes.

In a public class setting, this is even more important. Your teacher is doing their best to make the practice accessible to the whole group, but only you know what is best for you. Today could be a very different day in your body than yesterday was. The particular sequence the teacher is working with could present a very different set of challenges to your body than it does for the person next to you. You always have agency over your practice, so (within reason and with guidance) these decisions are up to you in a given moment.

So what are some reasons you might want to skip or modify the vinyasa sequence?

  • You have a specific area of your body that you need to work with in a certain way (think strength vs. flexibility)

  • You have pain or an injury that requires modification

  • You want to challenge yourself

  • You want to change things up a bit to stay more mindful

  • You need more time to feel a certain pose in your body and make sure you’re doing it in a pain free way

  • You’re focused on controlling your breathing and you find this series of movements too taxing at this point in your practice (whether that point is this month or this moment) to maintain your breath through them

  • You want to maintain the integrity of your practice and the pace set by the class is not one you can follow at this moment

  • You just need a break for a moment after a particularly challenging last sequence

I’m sure you may think of many more reasons, but any of these reasons show that you are practicing “skill in action”. It is skillful to choose protection over blind following. It is skillful to recognize your strengths and weaknesses and to act to find balance.

So what can you actually do to practice in this way? Here are a few ideas for modifications of the sequence and some reasons behind them.

To avoid the vinyasa all together

Child’s pose - This is commonly offered as I mentioned above as a modification when you need a break. While that is certainly true there are some other reasons you might consider this option:

  • Your breath isn’t under your control

  • Your spine needs a forward fold after the previous sequence

  • Your shoulders need a break from habitual tension

  • It’s just a happy place for you. Nothing wrong with taking a moment to just feel good!

You can also tuck the arms alongside the legs here for an even more shoulder releasing option.

You can also tuck the arms alongside the legs here for an even more shoulder releasing option.

Stay in Down Dog - This is another option I’ll often offer as a modification because it can have strengthening effects, especially for the newer practitioner. Some other reasons to consider staying here are:

  • It’s not a restful pose for you yet and you need more time there (beginners often look at me like I have 3 heads when I mention this might become a resting pose someday! LOL)

  • You have wrist pain or injury that prevents you from bearing weight like you would in plank

  • You need to strengthen your wrists or forearms (gripping the mat with finger tips and even lifting the back of the hands alternately can be great ways to get this benefit here)

  • You want to strengthen instead of rest

  • This is a more active resting pose for you compared to child’s pose, so you still get some rest here but you don’t quite need child’s pose

  • Your calves and hamstrings could use a stretch

  • You need some time to find length in your spine after a previous sequence that included back-bending or forward-bending

downdog side.jpg

Come Into and Stay In Plank - I only recently thought of this one myself! You may want to give this a go if:

  • You’re working on building upper body strength and core strength

  • Backbending isn’t feeling good due to injury (staying here can help strengthen your core to support your back if done with good alignment and engagement)

  • You aren’t yet warm enough to perform a backbend

  • You’d like to challenge yourself

  • You’re working on understanding the details of the pose (we tend to blow by this one rather quickly, this can be true for many postures in the vinyasa sequence in fact)

plank side.jpg

To modify the vinyasa itself

Skip the chaturanga - This is one of the most popular modifications for the vinyasa sequence. Chaturanga takes an incredible amount of strength, skill and awareness to perform well. Better to build strength and do one chaturanga well in a class than a bunch of sloppy ones that could cause injury over time. This is skill in action again.

  • To do this, drop your knees and roll down, maintaining core engagement and keeping the elbows hugging into the ribs while the shoulders relax. This will help build upper body strength over time, especially if you go slowly.

Choose a different back bend - Who says you have to do up dog?! There are a lot of great reasons to choose something else to work with in the sequence that will fit just as well (note that I didn’t say flip over and do bridge!). Here are some ideas:

  • Cobra is not as deep and doesn’t require as much upper body strength as up dog 

  • Locust is a great back body strengthener and will also keep weight out of your wrists and shoulders if you have injury or pain there

  • You could also lift the hands in cobra to practice keeping the legs pressing and the spinal muscles working instead of using the hands to push up. This is a great modification to work with especially if you experience any back pain in the pose. It may help you figure out where you need to engage more for support or if up dog is just too deep for you at the moment.

  • You want to get more comfortable with a certain backbend. Repetition is the key to learning.


We do need to maintain the group class environment and this isn’t license to do anything you want at any time. But being able to skillfully modify your practice for YOU is key to a lifelong practice. And we want this to be a life long practice, don’t we??

Do you have other ways you modify this sequence? Or are there other reasons to modify that I may have missed? Leave a comment! I’d love to hear from you!


If You Enjoyed This Post You May Also Like…

The perfect breathing practice to relieve stress and anxiety

In all my classes this month we are focusing on our breathing. Breathing and yoga go together like bread and butter, but it can take a bit of practice to make it all work. The overall effect is a calmer mind and body when done well. While the breathing practice we try to maintain during a vinyasa practice, called ujayi breath, is wonderful calming breath, if you’re experiencing stress and anxiety there’s another one should should really consider practicing.

That breath is alternate nostril breath.

I often say I wish I had known about this breath when I was auditioning for orchestras when playing the bassoon was the career I thought I’d spend my life in. The anxiety of that experience always left me with shaky hands, a dry mouth and not much in the way of coping mechanisms to work with that bodily state other than taking more auditions. Now, I use this breath any time I’m experiencing stress or anxiety. The key though is to have an established practice. Only then will you remember to do it in your time of need.

Alternate nostril breath is said to balance the energy channels on the two sides of the body. Those energy channels just happen to coincide with our two nostrils. The right side is said to be the more energetic side, the left side is said to be the more calming side. By doing this breathing practice you are bringing those two sides into greater balance and harmony. The effect can often be felt after just a few repetitions.

Here’s how to practice this breath:

First, choose a hand position that works for you. I usually offer three different possibilities. The first is Vishnu mudra. The first two fingers are curled into your palm. You use your thumb and the last two fingers to alternately open and close the nostrils. It looks like this:

IMG_0194.jpg

The second possibility is to instead take the first two fingers and anchor them at your third eye space or the space between your eyebrows. Just as above, the thumb and pinky fingers are then free to open and close the nostrils. That looks like this:

IMG_0216.jpg

The third option is to just choose to do it however is most comfortable for you! That might look something like this:

IMG_0202.jpg

Once you have a hand position that works for you you’ll then follow this sequence to perform this breathing practice (these instructions assume you are using your right hand):

  1. Close the right nostril with your right thumb and inhale through the left nostril.

  2. Immediately close the left nostril with your right ring finger and little finger, and at the same time remove your thumb from the right nostril, and exhale through this nostril.

  3. Inhale through the right nostril. Immediately close the right nostril with your right thumb and exhale through the left nostril. This completes one full round.

You’ll continue this sequence for about 3-6 rounds to start. Allow the breathing to be slow and deep without being forced. Always end with the exhale through the left nostril (remember how we said this was the calming side above? That’s why. We want to end on a calm note!).

When you’re finished, take a few breaths through both nostrils and take the time to notice the effect of your practice.

If you are experiencing congestion or there is a blockage in the nostrils best not to try to do this breath. If you’ve been practicing it for a while, imagining it can be highly effective as well, but you first need to have an established practice.

You can practice this breath a couple times a day for a couple of rounds to start out. Over time as it becomes more comfortable, you can extend how many rounds you do at once. With time and practice you’ll notice a greater calming effect. You may also find this breath helpful in times when your energy is feeling low. The balancing quality of the breath works the other way as well.

Did you find this helpful? Do you practice this breath regularly? Do you have questions about this practice? Let me know in the comments!