3 Keys to a More Stable High Lunge
/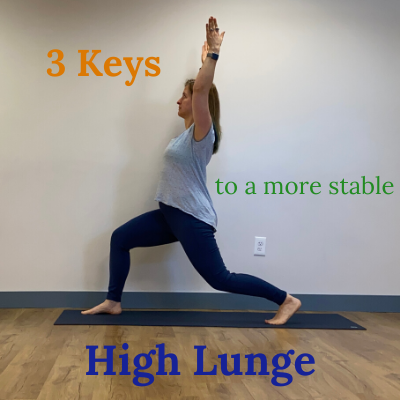
“Weebles wobble but they don’t fall down!” was a clever marketing catch phrase from my childhood (oh Lordy am I dating myself now!) and something I’ve been known to say to encourage my students with a smile and a laugh when they’re having a hard time in balancing postures. One posture that this comes up in is high lunge. It’s a common posture in a vinyasa practice and can present some real challenges depending on where you find it in a sequence and how fast it flies by. But I’m here to help! Here are 3 strategies that might make this posture more stable (and even enjoyable!) for you.
1. Set yourself up for success by aligning your feet well. Foundation is always the first thing to consider in any yoga posture, and how you align your feet in this pose will either set you up for success or failure when you try to lift your torso.
Traditionally, if you’re standing in tadasana or mountain pose, you may have been taught to have your big toes touching and your heels slightly separated. While that may work for some bodies, including the traditionally slight statured Indian male, if you’re an American woman such as me, you may find this not only unstable but restrictive in your outer hips. Instead, take your feet farther apart. I usually say sit bones distance, which can be measured by taking your two fists between the arches of your feet. With that little bit of extra space, you’ll have created a broader foundation for whatever you build on top.
Now with that broader foundation, as you bend forward and step one foot back to prepare for high lunge, see that the foot that goes back stays in that same line. There’s a natural tendency for it to drift into the center of the mat a bit, so resist that tendency and keep the foot wide to the side. This way, when you come up into your high lunge you’ll have that broader base to support you and maintain stability.
2. Draw the torso up through center rather than forward and up. This is subtle, but this is an energy management strategy. If you try to reach your arms forward as you lift the torso your energy and your focus will move OUT rather that in and up. Think of it this way, if you wanted to shoot and arrow up into the sky you wouldn’t aim it forward first and then expect it to turn upward somehow. The same is true for the energy of lift that you’ll need to bring up your torso.
Instead, as you exhale (because breath is always a good part of any strategy in a yoga posture), draw your arms up through center as you lift your torso. You might imagine that as you start to lift you’re going to take your hands up from the ground bending your elbows to touch your outer hips first, then draw them along the sides of your torso and up to the sky. Your torso will naturally follow this movement and you’ll contain your energy output to move in the direction you want to move, rather than a direction that isn’t necessary.
3. Engage the muscles surrounding your outer hips. This is an area we don’t think about very much in daily life, but the group of muscles that surround your outer hips are so important to creating stability in any standing posture.
As you move into the pose, feel as if these outer hip muscles are squeezing in towards the center of your body and maintain that feeling as you hold the posture. It’s as if someone came behind you and placed their hands on your outer hips and gave them a hug. You can even use your own hands to create this feeling and notice if the muscles here are doing the work you’re asking of them.
Having a hard time connecting to these muscles? We’re working on strengthening and engaging this area in my classes all this month. Come in for a class or sign up for Digital Membership to learn how to engage and strengthen this important area of your body more readily!
If You Enjoyed This Post You May Also Like…