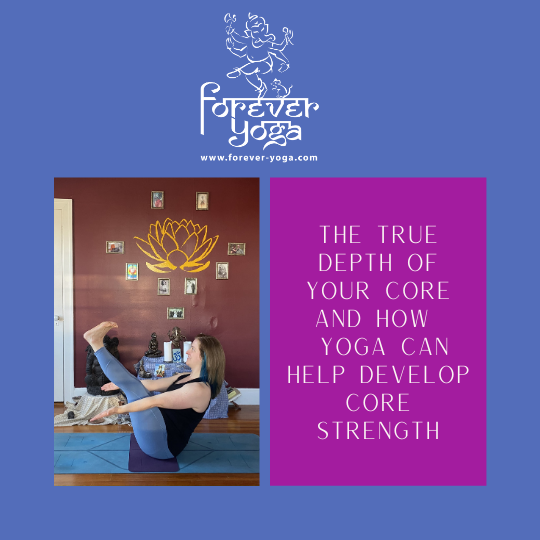
The True Depth of Your Core and How Yoga Can Help Develop Core Strength

true depth of your core and how yoga can help develop core strength.png

I hear it all the time “I really need to work on my core strength”. People say this for many reasons: back pain, a few extra pounds, balance, poor posture, a general sense of dissatisfaction. Most of the time when saying this they’re referring to the front side of the abdomen. And let’s face it, it’s the part we can see so it’s the part we pay attention to the most! But what if I told you that your actual core was not just your abs AND, maybe even more importantly, your core was actually something to think about in 2 different depths in your body? Here’s a simple introduction to two possible ways to think about the true depth of your core and how yoga can help develop core strength.

Let me preface everything I say here with the following: your body is an incredibly complex system and no one system can be separated out entirely from the rest in practical application. This is also true for your muscles. We can take individual muscles or groups of muscles into consideration as a model to start to understand our bodies better, but just know that the interrelationships between individuals and groups within the whole is complex and beyond the scope of a single blog post. What I give you below is a model for how to think about and work with this one system within the body that we know as our core.

Deep Core

As I mentioned above, I really think about the core in two different ways. The first way is what I would refer to as the Deep Core. In anatomical language, what is superficial is closer to the surface (in other words, just under your skin) and what is deep is, well, DEEP! So this first way to think about core involves some things that you can’t necessarily touch with your hands.

The first of those is your SPINE. In discussions of Core, this is often overlooked, but if we consider the core to be at the center of our body, we have to first consider the bony structure that is not only at center, but is an attachment point for many muscles that we might think of as Deep Core muscles. It’s also worth noting that most of us, because you can feel your spine through the back side of the body (just put your hand on the back of the base of your neck. That bony bump that sticks out is actually your C7 vertebra), don’t have a good understanding of just how deep the spine goes into the abdomen. I can’t give you definite measurements, but trust me, it’s pretty deep!

Now we get to the muscles of core and here is where, in my mind, I start to make some distinctions. Generally speaking, the muscles that run along and attach to the spine are muscles that mostly create spinal (or deep core) stability. Key among these is the psoas. This large muscle is often thought of as a hip flexor, but in reality, it’s PRIMARY function is to create stability and absorb shock in the spine. While it does serve a small part in hip flexion (remember, complex system) we can see that the bulk of the muscle is much more focused on the spine, simply by looking at how many more muscle fibers are near or attaching to the spine versus the hip joint.

the psoas muscle stabilizes and absorbs shock in the spine.png

There are many other deep muscles that stabilize the spine include the amazing network of interspinal muscles and the erectors. Rather than getting bogged down with names and details, simply understand that there is the deep level to core that is centered near and surrounds the spine.
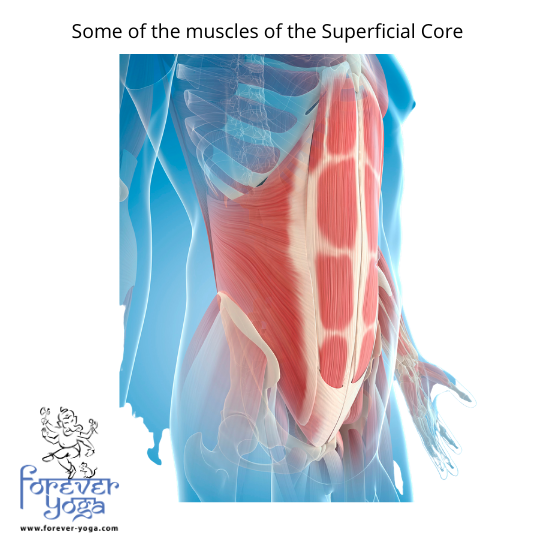
Superficial Core

There is this second level of core as I think of it. This is the one that most of us think of that includes the abs. However, a key concept here is, just as in the deep core, it’s not just the front! Generally speaking, the Superficial core is a full circumference network of muscles around the abdomen that mostly create movement. This includes your abs on the front but also includes your obliques (the sides of the cylinder), your lats (the back) and other layers of muscle. These muscles are fairly large and while they do contribute to stability, they can mostly be thought of as being responsible for movement such as flexing your spine, extending your spine, twisting and side bending. Therefore, to focus on only one set of these muscles is to loose sight of the full picture of what constitutes core.

some of the muscles of the superficial core.png

So we have a Deep Core network of muscles that is close to the spine and generally creates stability, we have a Superficial Core network of muscles that is closer to the surface and generally creates movement. This basically describes a cylinder that has a center within it. Something like this:

deep core inside of superficial core.png

So what about the top and bottom?

In my mind, the top and bottom are shared between these two levels (Deep and Superficial) because they cover both. The bottom is the network of muscles that make up the pelvic floor. The top is your breathing diaphragm. If you’ve never seen it before, it looks something like this:

breathing diaphragm as top of core.png

The umbrella like shape of this muscle puts a lid on our cylinder, connects to the spine but also connects in close proximity to those Superficial Core muscles around the outside. The pelvic floor works similarly. These structures create stability but are also key in movement throughout this complex system.

What It All Means

With this understanding that there are two main layers to our core as well as a top and bottom, we now see that the things we might always think of when it comes to core work, namely sit ups, really are addressing only one thing - the superficial muscles on the front side of the abdomen. Now also try to imagine that this was the ONLY thing you focused on when trying to strengthen your core. It becomes obvious right away that this would create an unhealthy and unhelpful imbalance. We need to work all these structures to bring a balance of strength and flexibility to the entire system in order to be well, similar to any other point of focus in the body.

How Yoga Can Help

While a vinyasa yoga practice can’t necessarily address the full picture of core strength, there’s a lot that we CAN do to holistically address the deep and superficial core in our sequencing as teachers and in our practice as students. Here are some ideas:

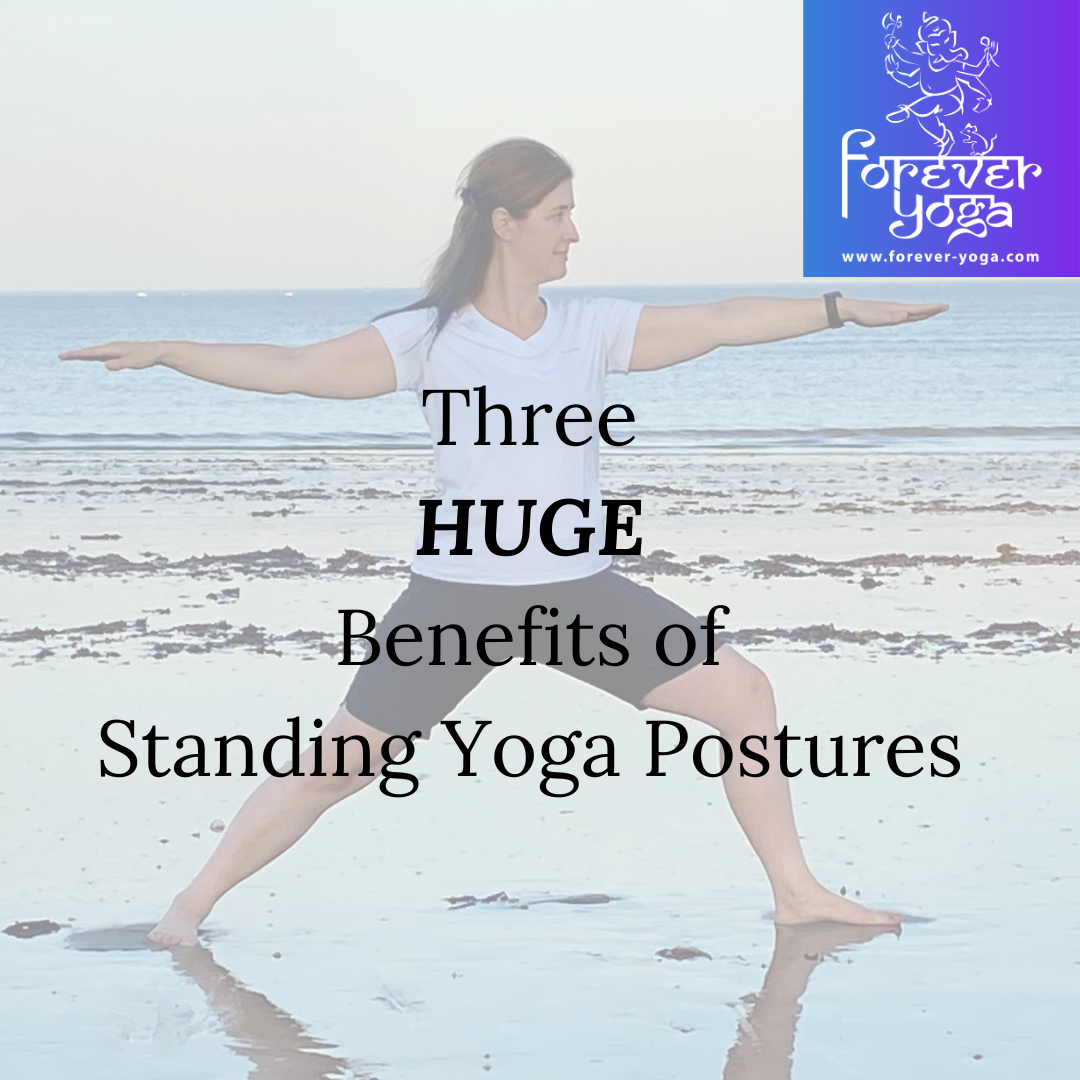
  • Rooting down through the feet in standing postures - this kind of engagement, especially before transitioning from close to the earth into a standing posture (think moving from low lunge to Warrior 2) can activate those stabilizing muscles of the deep core including the psoas. There is a complex network of muscular connections between the psoas and your feet (see the work of Tom Myers if you’re interested in learning more). When you engage in this way you’re helping to support the spine through transitional movements and creating that deep core stability those deep core structures are there to do. (For more about the benefits of rooting down in standing postures, see this blog post.)

  • Lifting high enough in Ardha Uttanasana (half way lift) - it’s a posture most people hardly give a second thought to in their practice, but actually lifting up in this posture can help to work the back body muscles and create more strength. Even better, think about that support coming from the front and the back. More on that here.

  • Create twisting actions without leverage - many yoga practitioners use their arms to help create leverage for deeper twists. This isn’t wrong. However, if you want to build core strength, especially in the muscles of the core that create rotation, consider doing your twist WITHOUT the arms involved. You won’t go as deep, but you’ll certainly create more strength in these important side body muscles.

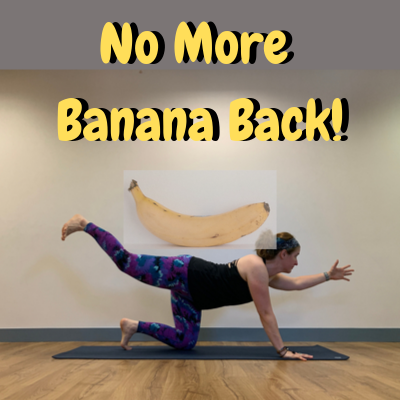
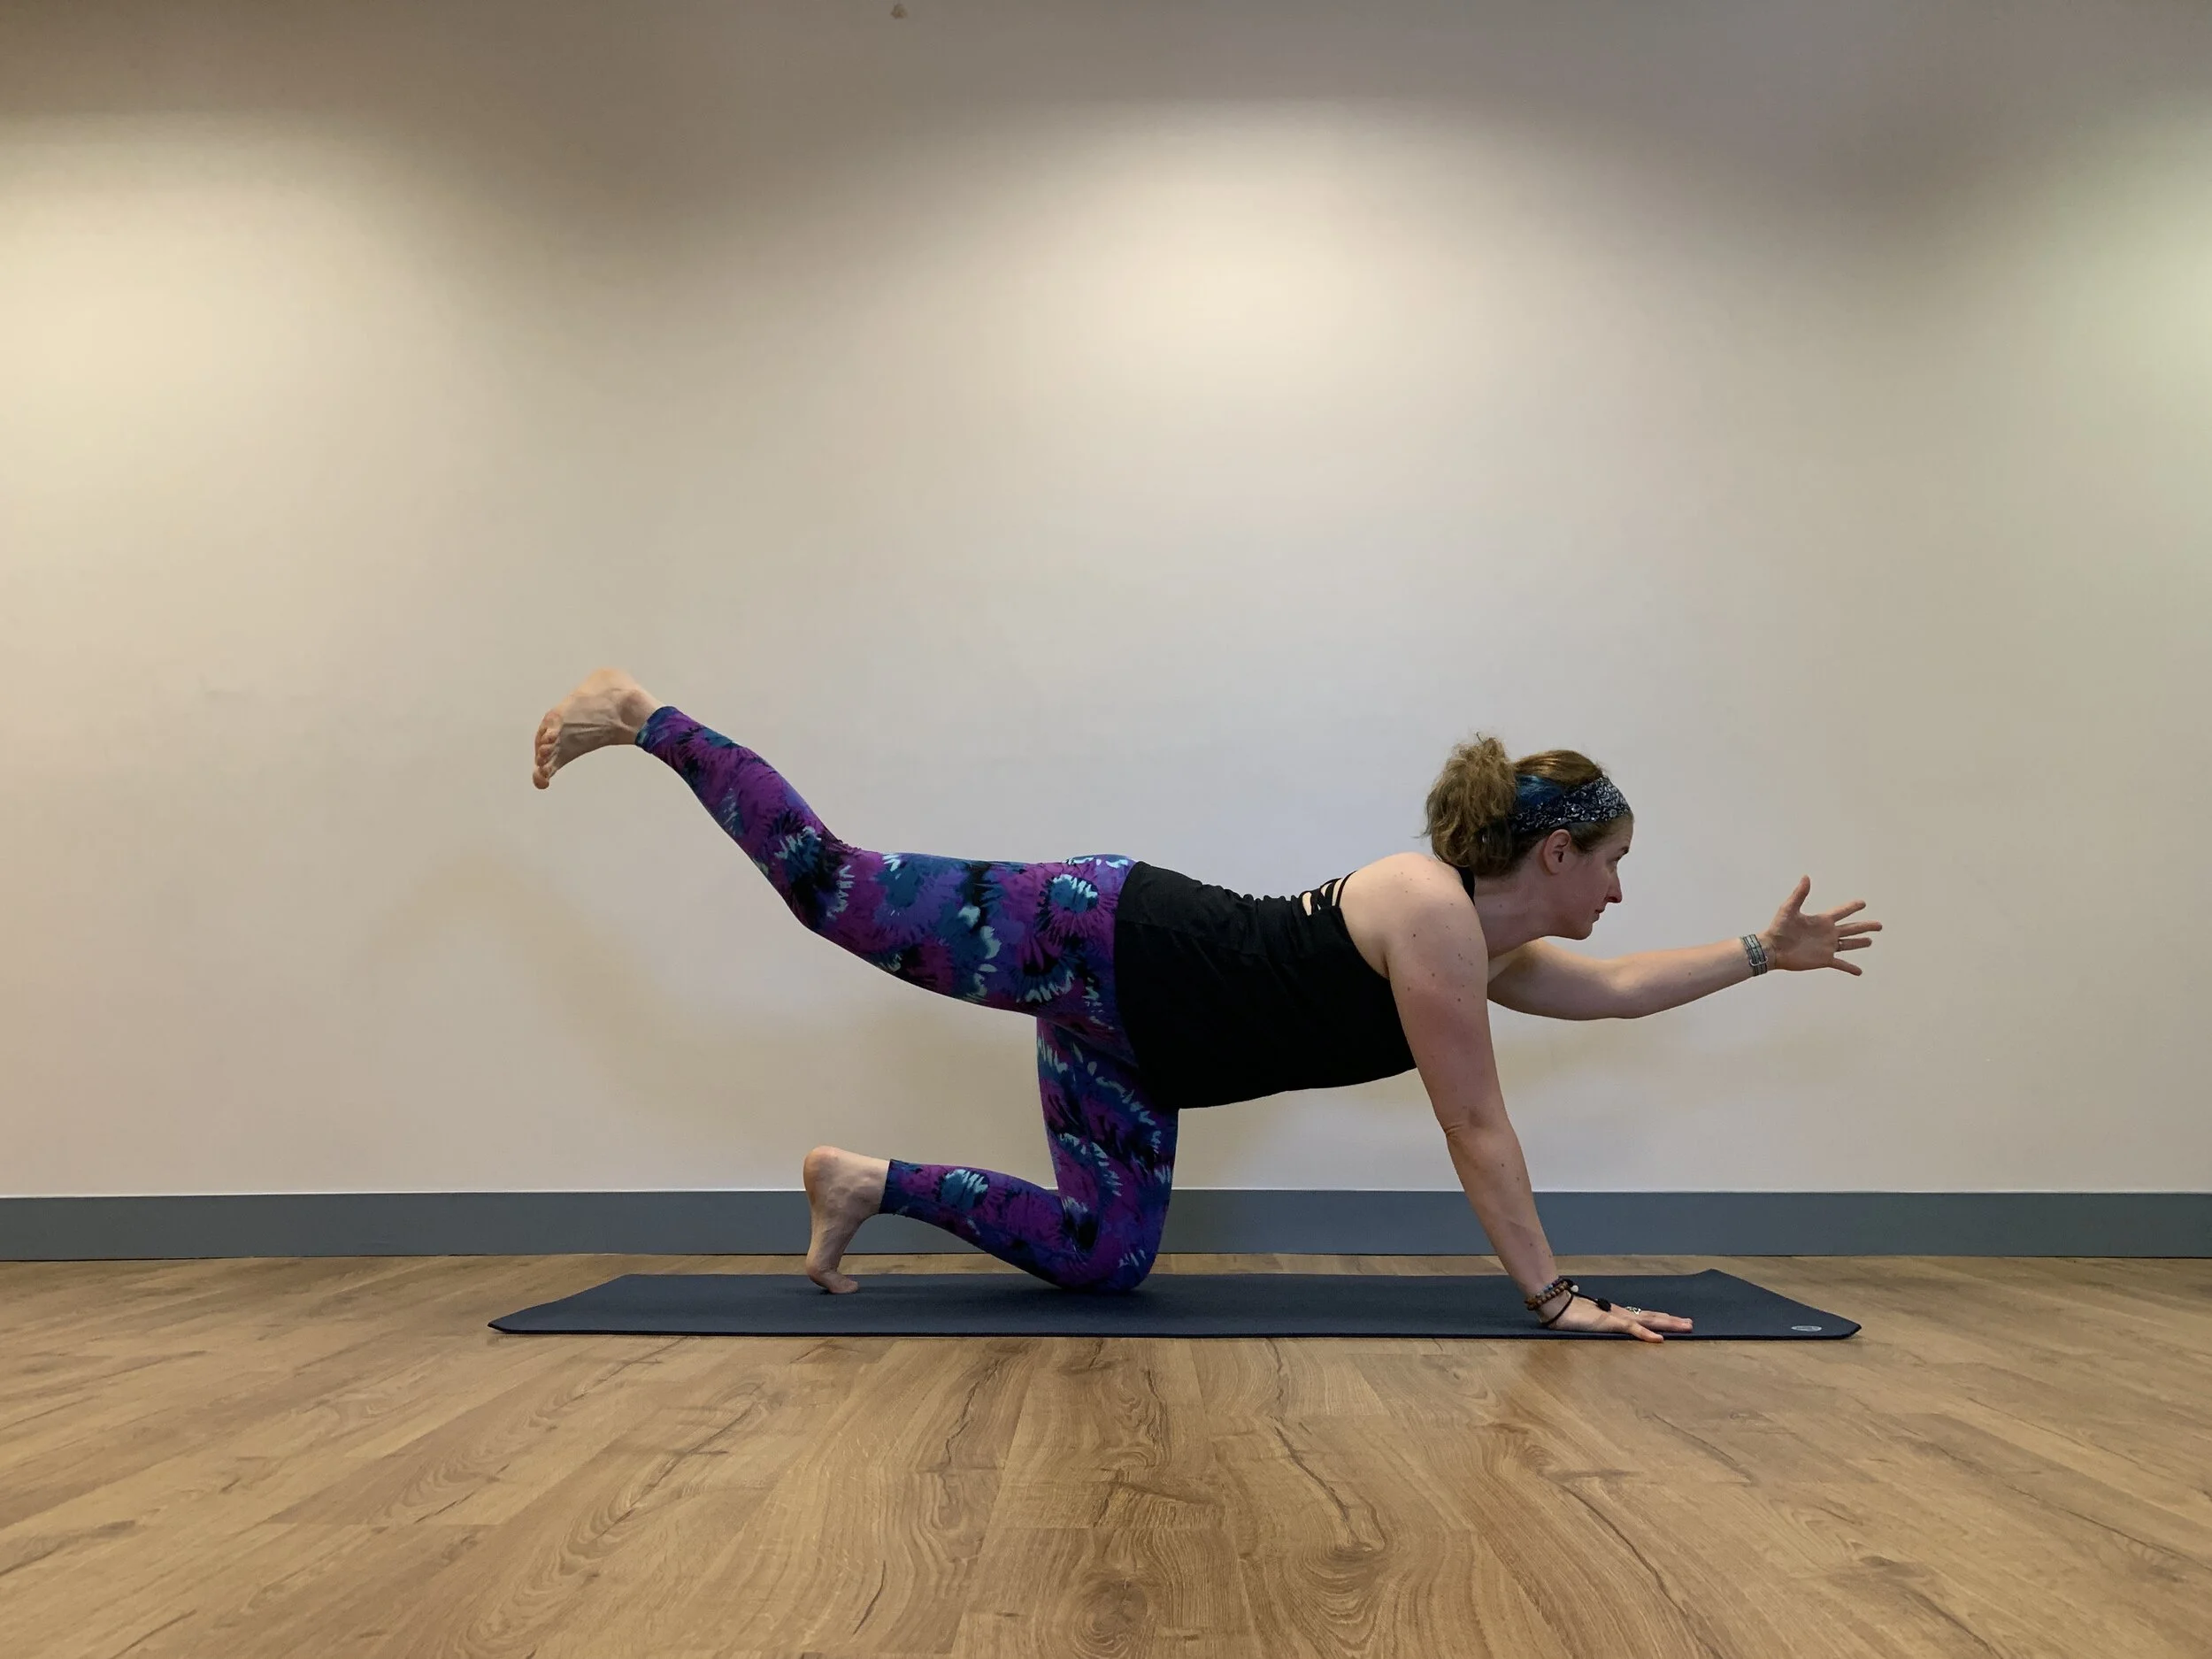
  • Incorporate more locust poses into your vinyasa - resisting gravity is a key way to build strength in a yoga practice and there’s almost no better pose to embody that than locust. When working with this posture, be sure to do your best to not just bend the knees when you lift the legs. See that the lift is actually coming from the use of your back body muscles like glutes (they’re part of your core!) and hamstrings.

  • Use the breath in coordination with movement - This is especially useful in movements that create a lot of force or load in the body. One of my personal favorites as a person with back injuries is to EXHALE on the way up to standing from a standing forward fold.

Want to experience this and more for yourself with some guidance? Then join my Livestream or On Demand classes all this month where we’ll incorporate many of these movements into a vinyasa flow to help strengthen ALL parts of your core together!


If You Enjoyed This Post You May Also Like…

Why You Can’t Stretch Your Way Out Of Pain

why you can't stretch your way out of pain

Acknowledging bias in our lives is always a good first step toward healing. Yoga teachers and practitioners have long held the belief that if something didn’t feel good in our bodies we could stretch our way out of the problem. I certainly thought that way for many years, particularly around my own back pain. Yet no matter how much I stretched, it didn’t ever seem to get better. I inadvertently realized the error of my ways when I started getting into hiking and began to develop more strength in my legs, hips and core as a result of scaling mountains with a backpack regularly. My back pain started to get better over time and I started to wonder if my hiking had something to do with it. I finally started to put two and two together when I started approaching my yoga practice in a way that incorporated strengthening actions along with the stretching I knew and loved. When I began to understand that the way I had approached yoga in the past had an inherent bias toward stretching and range of motion, and I began to balance that with strengthening actions within the practice, my body responded with less pain and more range. If you’re struggling with pain in certain areas of your body and stretching doesn’t seem to be changing it, here are some things to consider to bring balance to your body and your yoga practice.

Imagine that your muscles are like rubber bands for a moment. Let’s take your arm as an example. Your biceps and your triceps are on opposite sides of your upper arm. When your biceps contracts, your triceps has to lengthen. That’s a really good thing or you wouldn’t be able to bend your elbow! That muscle needs the ability to lengthen (aka stretch). But consider what would happen if your biceps didn’t have the ability to strongly contract. Imagine it was like a rubber band that had lost its spring. You still wouldn't be able to bend your elbow because it wouldn't have the strength to contract enough to create the movement. We might think of this as the muscle being “too long”.

Now imagine it the other way, which is what we often seem to notice the most in our bodies, especially if we’re dedicated yoga practitioners. Imagine you are trying to bend your elbow and your biceps is contracting, but your triceps is SO strong it can’t lengthen to allow the movement to happen. Now we have a situation where the muscle is “too short” or the sensation we often label as “tight”. Thinking about these two opposites starts to allow us to understand why this balance is important.

Another way to think about this - imagine a suspension bridge like the Golden Gate in San Francisco. The cables have to have just the right amount of length and strength to allow the structure to be stable while also allowing for movement. You probably don’t (want to!) think about it when you’re driving over such a bridge, but there are constant small movements due to weight of vehicles, wind speeds, temperature changes, (god forbid) seismic activity and other factors. Our muscles are similar in our bodies, giving stability to our underlying structure but also allowing for movement.

But with the human body there is one more curveball that we also have to consider. Muscles can be tight without actually being strong and they can be long and still be tight. To understand this, consider the person that spends hours a day hunched over a laptop. They might look something like this most of the day:

muscle imbalance.png

The body and the muscles are being held in a certain position for extended periods of time. Over time the muscles on the front side of the are being held in a shortened position. They aren’t actually being asked to contract and so they tend to become weak, but they stay shortened and therefore may be perceived as tight. On the other side, the muscles are constantly being stretched, or held in a lengthened position. They can’t possibly contract for many hours a day to counteract the position in which they’re being held, so they are long but are very weak from being over stretched which may be perceived as tightness. These positions of holding when repeated over time tend to bring about this chronic state that may be experienced as painful. An imbalance forms that won’t be helped by simply stretching, particularly for the muscles that are already too long.

These examples are a simplification and a model for a VERY complex system, but hopefully you get the general idea here. Constant stretching of muscles isn’t good, constant contraction of muscles isn’t good. We need muscles that can contract well and lengthen well. We need balance between the two. Without those two things in balance, we may experience pain.

Yoga does mean union after all so is it any surprise that creating balance between length and strength should really be our goal?

So what does this mean for our yoga practice?

The bias of yoga asana, at least the way that its been taught historically, is toward creating length and range of motion. Again, these are good things to have, but yoga can also help us build strength if we approach it a little differently. One way to do this is to engage a muscle at its end range of motion.

For example, let’s take pigeon pose. We might typically think of this posture as a hip opener (aka stretcher), particularly because of the way it may create a sensation of stretch in the hip flexors of the back leg and the rotational muscles of the hips in the front leg. For many people, finding their way into this posture brings them to that end range or maximum range of motion for several muscles. That’s not a bad thing. But now, once at that end range we can ENGAGE and create strength over time by pressing the back leg down and forward and the front leg (shin) down and backward. The legs won't actually move from the shape you’ve put them into, but the muscles will contract and create strength by doing so over time.

Engaging at End Range of Motion.png

The overall effect is that the muscles will, over time be able to move through a full range of motion while also maintaining their strength. That brings us to our ideal state. (In a perfect world anyway. Again this is a complex system.)

Notice that I keep using the words “over time” here. This is not an instantaneous change. It takes constant attention and constant practice.

One last quick note about those long and tight muscles - when we start to address this imbalance it can be challenging. In the example above of our laptop user, if she decides she wants to start to strengthen that back side of the body that is overly long, weak and tight, she may run into one big obstacle, a sometimes painful cramp. 😣 This shows up all the time in the hamstrings for many yoga practitioners in postures and actions like this:

strengthening action for the hamstrings.png

I’m hugging the heel of the back foot toward my buttocks without using my hand or a strap to do so. That asks the hamstrings to contract strongly and that’s often where the cramp happens. If that happens to you don’t give up! Go a little easier the next time around and increase the demand on the muscle(s) that are cramping over time. They’re basically telling you (rather loudly) that they don’t have the strength to do what you’re asking them to do just yet. It’s really something you have to build up to and takes a bit of patience.

I hope this starts to give you some ideas about how to bring more balance between stretching and strengthening into your yoga practice. Strength training outside of yoga certainly isn’t a bad idea for most bodies, but we CAN create more strength and stop worshiping at the altar of range of motion in our yoga practice if we simply bring more balance to our actions. A pain free, healthy and balanced body should always be our goal and bringing a greater focus on strength into our yoga practice can help us get there.

If you’d like to learn more about putting these ideas into practice, we’ll be working with the concepts here throughout the month of February in my Livestream and On Demand vinyasa classes as we always do. This month we’ll be specifically addressing the muscles surrounding the hip joint.

If You Enjoyed This Post You May Also Like…

Three HUGE Benefits of Standing Yoga Postures

Three HUGE Benefits of Standing Yoga Postures.png

Standing yoga postures are some of the most often practiced yoga postures across many styles and traditions of yoga. But have you ever taken a moment to step back and wonder WHY these postures show up so much? I honestly hadn’t until recently, but when I did I realized they really offer us some amazing benefits when we give them the attention and focus they deserve. Here are three HUGE benefits of these yoga poses and some ideas that might help you bring them into better focus and appreciation the next time you get on your mat.

Standing Yoga Postures Stretch and Strengthen Large Important Muscle Groups - Whenever you’re working in standing yoga poses you are either stretching or strengthening some of the largest and most important muscle groups in your body. These include all the gluteal muscles (did you know that there are three of them per side?), the hamstrings (there are three of them too!), the quadriceps (bet you know how many of those there are! 😉) and the calf muscles, along with some other smaller muscles that are in the same general neighborhood. Depending on the posture you’re doing, you may be flexing or extending key joints in the legs like your ankles, knees and hips helping them to move through their full ranges of motion.

Why is that important? If you’ve ever had the experience of being unable to walk without assistance you know why. The full functioning of our legs in our life is an essential key to a life well lived and part of what makes us fundamentally human. Think about how many things, both simple (getting to the bathroom) and more complex (getting around the grocery store to get everything you need from the top shelf to the bottom one), that you wouldn’t be able to do or would be extremely difficult without working legs. Certainly, many people overcome this obstacle in amazing ways, but if you have two functional legs this family of postures offers a great variety of benefits to keep them healthy and working for you for a long time to come!

Point of focus for practice: Cultivate a sense of the muscles of the legs engaging (contracting) in your standing postures. The ones that are in a lengthened position might build a bit of eccentric strength and the ones that are already stabilizing might build a bit of isometric strength, both of which are important and beneficial for many reasons.

Standing Yoga Postures Can Help Train Your Body to Balance - The standing postures that require us to stand on one leg are probably the most obvious that come to mind here, but if you’ve wobbled in your warrior or triangle pose you’ve actually experienced this benefit as well. Have you ever considered how incredibly quickly the messages between the sense receptors in your feet and legs have to travel to your brain and back to help you maintain your position in any of these postures? It’s so fast we don’t even notice it most of the time. The only time we tend to notice is when we DO feel that wobble happen. But here’s the great thing - those moments of wobble are creating experiences that train your body to respond and correct more accurately and more quickly by developing core strength, kinesthetic awareness and proprioception. It’s something that not a lot of people practice once they learn to walk. Living in New England, especially in the winter months, I really think of this as one of the greatest benefits of our practice. When you’re doing that winter shuffle to the car you have a much better chance of recovering if you start to slip than you would otherwise. That doesn’t mean accidents won’t happen, but it sure does stack the odds more in your favor!

Point of focus for practice: The next time you wobble and recover, instead of cursing yourself or getting frustrated for a weak moment, turn some gratitude toward your incredible body for being able to compensate and correct when needed. Then consider where it is you might need more engagement to help you maintain stability.

Standing Yoga Postures Can Make You Feel Grounded - Life has definitely shown us some serious challenges recently and a sense of not knowing when the next shoe might drop or the ground beneath us might shift again may still be operating in the back of our minds and hearts. [Incidentally, if that’s something that’s really bothering you, check out PSTEC to get some relief.] When we practice standing poses we have an opportunity to allow ourselves to make a deep connection with the steadiness of the earth beneath us through the parts of our body that were built for the job, our feet and legs! I’ll often draw your attention in class to rooting down into the earth through the feet before coming into a standing posture or again once you’re there. Have you ever noticed the rebounding effect that happens when you do so? There’s an amazing relationship there. You press into the earth and she gives you the energy and stability to grow and stand tall. That feeling and that relationship can’t be underestimated. The Warrior poses are called that for a reason! When you do them, you embody the strength of a warrior. That can be a great reminder of that quality existing inside of you when you’re feeling like anything BUT a warrior.

Point of focus for practice: The next time you come into a posture like Warrior 2, before you move into it, press down through the feet and see if you can feel that rebounding effect through your torso. It might be a sense of lightness or ease that allows you to float up rather than feeling like you’re trying to drag your torso away from the ground. You may also find you arrive in the pose with a greater sense of steadiness.

Not sure where to place your feet for your unique proportions or feel you could use more steadiness in standing postures? Join me for my upcoming workshop - Set Your Foundation: Finding Stability in Standing Yoga Postures.

Details and sign up here.

If You Enjoyed This Post You May Also Like…

6 Poses to Free Your Breath

6 yoga poses to free your breath.png

“The Breath Is Life Itself.”

I heard Sharon Salzberg say this recently in an online retreat. That’s certainly the view that the teachings of yoga present to us for consideration. The breath fuels everything from the fire of our digestion to the urge to eliminate to the length of our time here on earth according to the sacred texts. The circumstances of the last several months may have our breath feeling less than free and open for a variety of reasons including fear, stress, and sitting at computers more and more. If you find yourself unable to take a deep breath lately because your holding so much tension around your lungs and ribs, consider working with this simple sequence to bring some balance and freedom to the area.

As you approach this sequence you might look at it in one of two ways: 1) A series of postures you can hold for a couple to several breaths each or 2) some points to emphasize in the context of a flow. Either way is perfectly valid and will allow you to find some benefit. You might experiment with both ways depending on your energy level and the time you have to work through the sequence. Let’s look at each pose in turn and I’ll give you some options.

Cow pose - We don’t often see this posture without it’s complement, cat pose, but it certainly has merits on its own in the context of this sequence. As you move into it bring some emphasis to the feeling of broadness it may create through the front of the chest. I’ve heard some teachers talk about “pulling the chest through the shoulder blades” as you inhale into it and that certainly draws a good mental picture. Hold this one for one to several breaths or make it more dynamic by adding cat pose on each exhalation.

Gate pose - This posture creates a deep opening through the side body that may be felt not only through the rib cage but perhaps even up into the arm pit or down into the belly, hip and the standing leg. This is an area where many of us have considerable constriction. This can inhibit the breathing because the ribs aren’t as able to lift and separate from each other to create the space for deep breaths to enter the body. In our daily lives most of us don’t lift our arms into this position more than once a day on purpose! You might consider some padding under the standing knee for this one if your knees are at all tender. Be sure to do both sides!

At this point you may want to bring in some half sun salutations or some lunging salutations to warm the body and bring in some demand to the breath intensity, or as I mentioned above, you might just move into the next posture.

Low lunge - Bring careful attention to the alignment of this posture as I have it pictured here. Many practitioners come into the posture with the hips forward and down a great deal more with the front knee often coming past the ankle. In this version, I am purposely drawing a line from my hips straight down to the lower knee. The torso stacks on top of that and there may even be a little backbend here. Also important is the top of the back foot pressing down firmly into the mat. The overall effect of these details is a great deal more length on the front side of the body, especially through the hip flexors which are often tight and short. What does that have to do with the breath? I can almost guarantee that as you’re reading this, you’re sitting in a chair and perhaps a bit hunched forward. 😉 Try to take a deep breath in that position. Yeah, it doesn’t work so well. Now, sit up tall (even better, stand up and do this) and you may notice a subtle but tangible difference. Front body space allows for deeper breaths. It also prepares us for a real backbend. But first…

Twisting lunge - There is a whole network of long, rope-like muscles that run up and down the length of our spines. It’s a place where many of us hold tension we don’t even notice and many of these muscles tend to be under a great deal of stress because they’re over stretched. Twisting can relieve this tension in these muscles while also bringing length to some of those side body muscles that wrap the ribs and abdomen that we touched into earlier in this sequence. With this one you can always simplify by dropping the back knee to the floor. Also consider allowing the pelvis to turn into the twist and work together with the spine.

Bridge pose - There are so many benefits to this pose, but for our purposes here let’s focus on how this frees the breath. With the hands interlaced behind the back as pictured, there’s a great opportunity to broaden through the front of the chest. As the hips lift, nearly the whole front side of the body is opening as well. Additionally, with the hips above the heart we have a slightly inverted relationship with gravity. This gives us a chance to exercise the breathing diaphragm, an essential muscle of respiration that moves down toward the feet when we inhale and up towards the head when we exhale. In this position, instead of working WITH gravity as it normally would when we’re upright, it’s working AGAINST gravity (just a little bit) and you may actually find yourself having to work a little harder to take an inhale. It may be quite subtle, but this is good exercise for a muscle we don’t often consider strengthening in most forms of physical movement.

Supported Fish - Our last posture is one that when well adjusted can be quite restful and allow us to take advantage of the space we’ve created in the body for our breathing throughout this sequence. You can use two yoga blocks, one behind your skull (that’s important!) and one behind your heart. Depending on your experience with this posture and your flexibility, you might want the one behind your heart on the lowest level and the one behind your skull on the highest level or some other combination. You can also do this by rolling or folding up a blanket and laying back over it with it landing behind your heart, just below your armpits. Whichever option you choose, allow your arms to come out to the side and turn the palms up for more space through the front of the chest. Once you’ve settled in and gotten comfortable, this is a great place to linger and focus on your breathing. I like to imagine my breath coming in through the nostrils and down to the base of my spine and then filling my torso right up to my collar bones with breath and then allowing all the breath to release in reverse. Stay for a few breaths or several minutes and enjoy all that freedom you created!

You’ll find many of these postures in my vinyasa classes this month. If you can’t join me for the Livestream consider signing up for my new On Demand Video Membership through Patreon.


If You Enjoyed This Post You May Also Like…

How a Modern Interpretation of Foot Placement May Help Your Standing Yoga Postures

How a modern interpretation of foot placement may help your standing yoga postures.png

When I began my teaching career I noticed right away that many students had stability problems in standing yoga postures like Warrior 1, Warrior 2 and even Tadasana. As I continued to observe my students and experimented in my own practice, I found time and time again that a wider base of support seemed to eliminate these issues almost instantly. Depending on the lineage of teaching that a student and teacher may have come through, confusion may still remain as to appropriate foot placement for individual bodies in these postures. In this post you’ll find an anatomical explanation for this modern interpretation of foot placement and how it might help you feel more steady and at ease in these commonly practiced standing yoga postures.

Traditional versus Modern Interpretation

I often make the joke to private students when we start to work with these kinds of details in their postures that “this practice was created by skinny little Indian men, and honey, I’m an American woman and I have hips! I need space!” (If you’ve never met me in person I’m nearly 6 feet tall and weigh about 185, so I am neither small nor skinny!) All joking aside, what I’m pointing out is something very important to this understanding of foot placement - the traditional interpretation of the postures revolved around the narrow pelvis of the people that “created” the postures and the people that were being taught. Students of yoga in those days were of typically of Indian decent, young and male. They therefore had a naturally more narrow pelvis and were taught a more narrow placement of the feet in standing postures.

Anatomically speaking, our knowledge of an individual’s unique differences in their anatomy and how they might affect their practice has improved in the last century. We now know that the female pelvis is wider than the male pelvis, primarily to accommodate childbirth. This google search will give you some images and articles to make this more clear. But the important part for our asana practice is that, generally speaking, our unique anatomical make up, our general range of flexibility and the shape of our frame will have a great deal of affect on the stance we take in our standing postures. The majority of yoga practitioners in the US are female and with our more recent anatomical understanding many teachers, myself included, have begun to teach foot placement in standing postures in a more anatomically informed way.

Let’s give you some examples so you can start to put this into practice. And please bear with my rather rudimentary illustrations! And also bear in mind, the use of traditional vs. modern is NOT a value judgement, but a way of making a distinction.

Let’s take Tadasana (Mountain Pose) for instance:

traditional tadasana.png

In the traditional interpretation of the posture, the big toes would come together to touch as you stood at the top of your mat. Some people would even bring their inner heels together. Let me be very clear here: THIS IS NOT WRONG. For many bodies this won’t be a problem. For many other bodies this may feel like a very narrow base of support that isn’t at all grounded. In my body, this additionally creates a tension in my outer hips that doesn’t feel beneficial.

Also, when I look at the center line of my foot, it is offset compared to my pelvis. I can tell because when I feel my hip points (the two bones you might be able to feel if you palpate the front of the pelvis), if I were to draw a straight line down to the center of my foot, that line hits more towards my outer ankles. So instead, I take my feet “sit bones distance apart” (I often have people measure this by bending forward and taking two fists together between the arches of the feet. It seems to work well.) which gives me a broader base and more appropriately aligns my body. So it would look more like this:

modern tadasana.png

With this broader base I’m more able to hold my ground, or be more firmly grounded in this pose that is supposed to embody stability.

This wider foot placement in Tadasana also translates into other common standing poses. Tadasana, is after all, the foundation for every other yoga posture. Take Warrior 2 for example. Here’s what the traditional foot placement would look like:

traditional warrior 2.png

You can see from the lines on this mat (thank you Liforme!) that the heel of the front foot would have bisected the arch of the back foot. (I have also heard it described slightly wider, so that the heel of the front foot would have lined up with the heel of the back foot in traditional teaching.) This might give a practitioner with wider hips a feeling of, what I often call “walking the tightrope”; the base of support is too narrow to be stable. This often shows itself not while the practitioner is in the pose, but when they are making the transition up into the pose from a lunge, for example. There’s a wobble that happens in that transition and I’ll often see students reflexively step the back foot wider to catch themselves! What they’re instinctively doing is creating a stance more like this:

modern warrior 2.png

This comes into play again when we look at Warrior 1. Again, the more traditional placement would look like this:

traditional warrior 1.png

But for many bodies, this foot placement becomes problematic when the practitioner attempts to make the transition into the pose from a lunge and/or places unnecessary forces into the knee joints in particular as the pose is held. With Warrior 1, as the pelvis rotates toward the top of the mat, the narrow stance may not allow for much rotation. With the pelvis unable to rotate and force still being applied (a discussion for another day), that torque has no where to go but to the next available joint, which is the knee. Unfortunately for our poor yoga student who is fighting to do what is asked, the knee is a hinge joint and does not lend itself to rotation. Chances are, they feel this as something happening IN the joint, a thing we typically want to avoid in a vinyasa yoga practice. This can all be avoided by stepping the feet wider like so:

modern warrior 1.png

With the broader stance pictured above, there’s greater freedom for the rotation of the pelvis, the integrity of the knee is no longer questionable and there will be a greater sense of stability in the pose overall.

What Does This All Mean for You?

To apply what you’ve learned here you might take the time to experiment with these different foot placements outside of a class. Start with Tadasana and see how your body feels with the two different foot placements. Depending on your specific body type and shape, you may find one that feels more stable and easeful than another. Then do the same experiment with Warrior 2 and Warrior 1. Take the time to really notice the effect on the joints of the legs in particular and your sense of stability. Do you feel like your “walking the tightrope” or if a strong breeze came by would you be steady? As with anything in yoga, the proof is in the experiment within the laboratory of your own body, life and practice!

I’m considering offering a workshop on this topic in the near future. If you’d be interested in such an offering, let me know in the comments below or send me an email!

If you’d like to experience a group class with me where I teach this more modern interpretation, check out my schedule for an upcoming vinyasa yoga class.


If You Enjoyed This Post You May Also Like…

Get to Know Your Shoulder Joint

1.png

Part of the study of yoga is getting to know our bodies better. With all our focus on the shoulders lately in my classes, I thought it might be helpful for you to get to know your shoulder joint a bit more from an anatomical standpoint. If your eyes glaze over when anyone says anatomy I understand! That was me for a very long time. But when you see how the knowledge of anatomy can inform healthy movement patterns and inform the choices you make in your practice, it all becomes a little more palatable. I'm going to give you a very basic overview here which I hope will enable to you to make good choices for your own body as you move through your life and practice.

What is a joint in the human body?

First - a basic definition. A joint is where two or more bones come together in the human body. You probably already knew that. We typically think about the knees, hips and shoulders when we think of joints but did you know there are also joints in your spine, your fingers and toes and other places? This simple definition helps us be clear as we move forward.

Bones of the Shoulder

bones of the shoulder.png

There are three important bones that create your shoulder joint as you can see labeled above. I’ve given you both the common and the technical name for each of these. I highly recommend that you palpate your own body with your hands as you look at the image to really find these things in your own body. If you have a willing and consenting other human nearby that can be helpful too! The combination of read information and sensory input will help you learn.

The first and probably most obvious is your Humorous or upper arm bone. It’s probably the bone that we think about the most when we think about the shoulder. It may even be the ONLY bone we think about when thinking of the shoulder. But there are two more important players.

The second is the Clavicle or collar bone. It’s that bone on the front side of the body that extends from the front of your neck (just slightly offset to the right or left) out to your shoulder. You’ll find it at the top of your rib cage and it forms the part of the top edge of what we often think of as our shoulder. If I asked you to take your left hand and put it on your right shoulder the heel of your hand would likely be resting on this bone.

While you’ve got your hand on your shoulder [you did do that didn’t you?! ;-)], your fingers are probably curling over the back of your shoulder and that’s where you’ll find the third bone, your shoulder blade or Scapula. You may never have thought of this before, but your shoulder blade is called your shoulder blade because it’s an essential part of your shoulder joint! And what you’re likely feeling under your fingers is what’s often referred to as the “spine” of the shoulderblade. The tip of that spine (closer to the outside of your body) is called the Acromium.

So where’s the actual shoulder joint?

shoulder joint.png

The actual shoulder joint (or glenohumeral joint if you want to get technical) is where the humorous and the scapula fit together. There’s a shallow cup on the shoulder blade where the upper arm bone fits in. They are connected together first by connective tissue (labrum, cartilage, ligaments, etc.) and then by a series of complex muscles known as the rotator cuff. So unless you have an injury or something else going on, the big thing to know here is that your upper arm bone (humorous) is attached to your shoulder blade (scapula). While the collarbone is not directly connected here it does play an important role in movement, but that’s a bit beyond the scope of the current exploration.

Why should you care?

movement of the scapula and humorous.png

Any time you move your upper arm bone your shoulder blade MUST move. This becomes really important when you set up for postures like bridge or wheel because how you position that upper arm bone will influence the movement of the scapula and therefore the whole shoulder joint. Any time you take the arms overhead like in Warrior 1 or Down dog, the shoulder blades must also move upward (that’s an over simplification but for the purposes of this discussion it’s sufficient). Not allowing the shoulder blades to move properly may cause trouble over time for the healthy functioning of the shoulder joint.

Knowing how these two bones are connected also gives us a better understanding of what “stability” in the shoulder joint really means. There are three very stable positions for the shoulder joint: 0 degrees of flexion (when the arms are resting alongside your torso in a standing position), 90 degrees of flexion (plank pose) or 180 degrees of flexion (arms directly overhead like in handstand). This is helpful if you DO have an injury or strain in this area because you can pay attention to how your bones are aligning to create stable positions and avoid unstable ones. You can also offload weight from the shoulders if they are moving between any of these angles if you do have an injury or you know that you still need to build strength in this area (chaturanga anyone?!).

Questions? Leave me a comment below!

If you want to get to know your shoulders more through movement, sign up for one of my livestream classes this month or join me on Patreon to practice on demand!


If You Enjoyed This Post You May Also Like…

3 Keys to a More Stable High Lunge

3 Keys.png

“Weebles wobble but they don’t fall down!” was a clever marketing catch phrase from my childhood (oh Lordy am I dating myself now!) and something I’ve been known to say to encourage my students with a smile and a laugh when they’re having a hard time in balancing postures. One posture that this comes up in is high lunge. It’s a common posture in a vinyasa practice and can present some real challenges depending on where you find it in a sequence and how fast it flies by. But I’m here to help! Here are 3 strategies that might make this posture more stable (and even enjoyable!) for you.

1. Set yourself up for success by aligning your feet well. Foundation is always the first thing to consider in any yoga posture, and how you align your feet in this pose will either set you up for success or failure when you try to lift your torso.

Traditionally, if you’re standing in tadasana or mountain pose, you may have been taught to have your big toes touching and your heels slightly separated. While that may work for some bodies, including the traditionally slight statured Indian male, if you’re an American woman such as me, you may find this not only unstable but restrictive in your outer hips. Instead, take your feet farther apart. I usually say sit bones distance, which can be measured by taking your two fists between the arches of your feet. With that little bit of extra space, you’ll have created a broader foundation for whatever you build on top.

Now with that broader foundation, as you bend forward and step one foot back to prepare for high lunge, see that the foot that goes back stays in that same line. There’s a natural tendency for it to drift into the center of the mat a bit, so resist that tendency and keep the foot wide to the side. This way, when you come up into your high lunge you’ll have that broader base to support you and maintain stability.

2. Draw the torso up through center rather than forward and up. This is subtle, but this is an energy management strategy. If you try to reach your arms forward as you lift the torso your energy and your focus will move OUT rather that in and up. Think of it this way, if you wanted to shoot and arrow up into the sky you wouldn’t aim it forward first and then expect it to turn upward somehow. The same is true for the energy of lift that you’ll need to bring up your torso.

Instead, as you exhale (because breath is always a good part of any strategy in a yoga posture), draw your arms up through center as you lift your torso. You might imagine that as you start to lift you’re going to take your hands up from the ground bending your elbows to touch your outer hips first, then draw them along the sides of your torso and up to the sky. Your torso will naturally follow this movement and you’ll contain your energy output to move in the direction you want to move, rather than a direction that isn’t necessary.

3. Engage the muscles surrounding your outer hips. This is an area we don’t think about very much in daily life, but the group of muscles that surround your outer hips are so important to creating stability in any standing posture.

As you move into the pose, feel as if these outer hip muscles are squeezing in towards the center of your body and maintain that feeling as you hold the posture. It’s as if someone came behind you and placed their hands on your outer hips and gave them a hug. You can even use your own hands to create this feeling and notice if the muscles here are doing the work you’re asking of them.

Having a hard time connecting to these muscles? We’re working on strengthening and engaging this area in my classes all this month. Come in for a class or sign up for Digital Membership to learn how to engage and strengthen this important area of your body more readily!

If You Enjoyed This Post You May Also Like…

No More Banana Back!

No More Banana Back!.png

In today’s blog post I’d like to give you a visual and verbal understanding of a very common condition amongst yoga practitioners in various postures that involve extending the hip joint.

Banana back is a funny way of describing what can happen for yoga practitioners who are super flexible, but not necessarily strong, or just don’t have a keen awareness of this area. 

As always, we want to do our best to balance the two qualities of strength and flexibility. Any time we do a movement that requires engaging the muscles that extend the hip, depending on our level of flexibility in the low back or lumbar spine area, there is a possibility that we may be creating the extension from our back and not our actual hip muscles. 

This matters for a couple of reasons:

  • Our hip extending muscles tend to be weak due to our modern lifestyles. Muscles on the front of the body tend to be short and tight from hours of sitting; muscles on the back of the body tend to be overstretched and weak for similar reasons.

  • This muscle group tends to be weaker in men than women for physiological reasons.

  • Lumbar spinal issues tend to be the most common, due to many of the reasons above. There is a transition point in the spine in this area (there are several similar ones throughout the spine) that tends to be more vulnerable to misuse.

So what’s the solution? Using the muscles that were meant to do the thing to do the thing! And attention to detail of course.

I’m sure there’s a name for this pose but I’ll be darned if I can find it! If you know it, let me know!

I’m sure there’s a name for this pose but I’ll be darned if I can find it! If you know it, let me know!

In the picture above you’ll see a well supported version of this balancing pose that asks us to resist the pull of gravity when we lift the leg in particular. Some specific things to note:

  • I’m not lifting the leg higher than my hip. This isn’t about range of motion. It’s about a well supported lumbar spine and a strengthening action of contraction in the glutes and hamstrings.

  • My low back is in a natural curve, rather than an over accentuated one. The amount of curvature will vary across the bodies of different practitioners but for me, this is pretty good.

  • This may be harder to see in a picture, but everything that touches the earth is pressing DOWN fairly strongly. Engagement with the earth helps awaken core support.

Contrast this with the picture below. 

Ouch!

Ouch!

I hope you can see the difference. For me I could definitely FEEL the difference! Having brought some attention to this detail of my own practice for some time now, doing this movement without the core engagement, lifting my leg way too high and letting my ribs flare toward the ground instead of up towards the sky made this pose feel AWFUL on my low back and my other joints that were bearing weight. 

When I work in this posture in this way, there’s a sense of connection that isn’t there otherwise. My body feels like one cohesive whole, rather than a bunch of parts doing something but not necessarily working together.

I hope you found this explanation helpful! Let me know in the comments. :-)

What is Chaturanga, Why Should You Care and How to Get There (someday)

📸 credit @ginahouse

📸 credit @ginahouse

What is Chaturanga? 🤔

I realized recently in class that some of you have been wondering what this mysterious Sanskrit word means for some time!

Chaturanga translates to four limbed staff pose and is the posture you see pictured here. You’ll often find this posture in the sequence of poses called “a vinyasa” that goes - down dog, plank, chaturanga, up dog, down dog.

Why should you care about this pose?

This pose gets a lot of attention in the yoga world because it can be so difficult to perform well. The high number of repetitions you’ll find of this pose in a typical vinyasa yoga class and the fast speed at which they’re performed can also can invite sloppiness and therefore repetitive stress injury over time. However, if done well this posture can be very beneficial for modern bodies in many ways.

This posture and the strength you’ve gained when you’re able to do it well are also a prerequisite for postures such as arm balances and some inversions. Find confidence here and you’re more likely to have confidence in those poses as well.

As with any yoga posture (or with anything worth doing really), attention to the technical details allow for greater understanding and discernment in their execution. That translates to more safety, more ease, more knowing of yourself and your body… in short, more yoga (i.e. union). And isn’t that what we’re all looking for anyway?

How do you get there?

One way you can get yourself ready for doing a good healthy Chaturanga is by doing some fairly simple mini pushups with the knees down.

I know. I should put a trigger warning on the word pushup.

But it really isn’t that bad. As with any yoga movement, YOU get to decide how intense (or not) this one is.

The key things to remember are that you want to make sure your elbows HUG IN toward your ribs strongly (very different from the way most of us were taught to do pushups in the past) and that your elbows point BACK toward your hips as you bend them.

Some other important details - don’t let the head drop forward and don’t let the low ribs flare out. In other words, make sure your core is working to support your spine so you don’t get overly curved in your low back.

Here’s a video to help you visualize this strengthening movement:

Careful repetition with attention to the details, like so many things, is key to building the strength you’ll need for a good Chaturanga.

I hope that helps start to make this pose more accessible for you. Stay tuned for a workshop all about this pose next month and in the meantime, feel free to leave me a comment with any questions you have!

P.S. Check out our YouTube channel! We’re starting to add more content over there about yoga, meditation, mantra and more each week!

If You Enjoyed This Post You May Also Like…

Have you cried in a yoga class? You're not alone!

Have you cried in a yoga class?.png

Every once in a while a student will break down and cry during a yoga class. Depending on my relationship with the student and how much they’ve shared with me about what’s happening in their lives, I may go over to them and give them a reassuring pat on the back, offer them a tissue or just leave them alone. If this has happened to you in a class and you’ve found it surprising, (I mean, most of us come to yoga because it makes us feel better on most days) let me tell you a little story about what happened to me one day and why this is perfectly normal.

IMG_0036.JPG

This is Simba. She (yes she, long story) was the first pet I ever had that was really and truly mine. I picked her out of the shelter myself when I was in grad school (the second time, another long story) in CT and had finally moved into an apartment that allowed cats. I could not WAIT to finally have a pet that was more than a goldfish at that point in my life. I’d been in school for a long time and finding housing that allowed anything more than a fish had been nearly impossible to afford. But FINALLY, the time had come!

Simba saw me through a lot of transitions in my life and was always by my side. The bad breakup with the longtime college boyfriend. The transition from music school to library school and being a freelance musician. My first “real job” as a librarian in NYC. My eventual meeting and marriage to my husband. We moved 4 times, between 2 states in the 8 years we had together.

And then one horrible night I came home to find that over the course of a few hours between when the pet sitter had last seen her and when I arrived she had become quite ill. I rushed her to the vet in the aftermath of a snowstorm but it was too late. She had a previously undetected tumor and was bleeding internally. I had to say goodbye.

I was, as you might imagine, beside myself with grief at loosing my dear friend. I had completed my yoga teacher training at this point so I knew what could happen. I didn’t go to class for two weeks. I just wasn’t ready.

Finally, I walked back into the studio. My teacher knew what had happened so she knew what to expect. And sure enough, the moment she put us into pigeon for the first time there it was. Sobbing like Niagara Falls. She gave me a pat on the back, a tissue and let me cry. And I knew I could do that and not one person in the class would even notice much less judge me for doing so.

So why did it happen? I can’t point you to a specific text, but it’s well known in the yoga world that emotions are stored in our bodies. Especially the ones that we haven’t quite dealt with yet. So when we finally start to bring movement to these places and loosen the physical tension, the emotional tension might just come pouring out.

And this isn’t unique to grief. Anger, jealousy, sadness, fear… anything you can experience can settle in the tissues of your body, just waiting to be released someday. It can come at the most unexpected times too.

But before you run for the hills and never take another yoga class again, let me assure you, this release that comes is a good thing. It can help us move on. It can help us resolve the unresolved. It can help us finally feel the thing that we haven’t been able to feel so that we can let it go and live a happier life. It’s actually a gift.

While we each have our unique human experience, these strong emotions are not unique to us. If you’re afraid that your fellow students or your teacher will think less of you let me tell you right now, I think you are brave! You survived everything that’s come to you to get to this moment. And if you come to my studio and you suddenly need to cry in a class don’t you worry. I’ll bring the tissues and no one else will probably even notice. And if they do, they will be sending you love and compassion because they’ve been through some stuff too and they know how it feels.

So go get back on your mat and let (to quote Tosha Silver) whatever needs to come, come and whatever needs to go, go. We’ve got your back.