How a Modern Interpretation of Foot Placement May Help Your Standing Yoga Postures
/
When I began my teaching career I noticed right away that many students had stability problems in standing yoga postures like Warrior 1, Warrior 2 and even Tadasana. As I continued to observe my students and experimented in my own practice, I found time and time again that a wider base of support seemed to eliminate these issues almost instantly. Depending on the lineage of teaching that a student and teacher may have come through, confusion may still remain as to appropriate foot placement for individual bodies in these postures. In this post you’ll find an anatomical explanation for this modern interpretation of foot placement and how it might help you feel more steady and at ease in these commonly practiced standing yoga postures.
Traditional versus Modern Interpretation
I often make the joke to private students when we start to work with these kinds of details in their postures that “this practice was created by skinny little Indian men, and honey, I’m an American woman and I have hips! I need space!” (If you’ve never met me in person I’m nearly 6 feet tall and weigh about 185, so I am neither small nor skinny!) All joking aside, what I’m pointing out is something very important to this understanding of foot placement - the traditional interpretation of the postures revolved around the narrow pelvis of the people that “created” the postures and the people that were being taught. Students of yoga in those days were of typically of Indian decent, young and male. They therefore had a naturally more narrow pelvis and were taught a more narrow placement of the feet in standing postures.
Anatomically speaking, our knowledge of an individual’s unique differences in their anatomy and how they might affect their practice has improved in the last century. We now know that the female pelvis is wider than the male pelvis, primarily to accommodate childbirth. This google search will give you some images and articles to make this more clear. But the important part for our asana practice is that, generally speaking, our unique anatomical make up, our general range of flexibility and the shape of our frame will have a great deal of affect on the stance we take in our standing postures. The majority of yoga practitioners in the US are female and with our more recent anatomical understanding many teachers, myself included, have begun to teach foot placement in standing postures in a more anatomically informed way.
Let’s give you some examples so you can start to put this into practice. And please bear with my rather rudimentary illustrations! And also bear in mind, the use of traditional vs. modern is NOT a value judgement, but a way of making a distinction.
Let’s take Tadasana (Mountain Pose) for instance:

In the traditional interpretation of the posture, the big toes would come together to touch as you stood at the top of your mat. Some people would even bring their inner heels together. Let me be very clear here: THIS IS NOT WRONG. For many bodies this won’t be a problem. For many other bodies this may feel like a very narrow base of support that isn’t at all grounded. In my body, this additionally creates a tension in my outer hips that doesn’t feel beneficial.
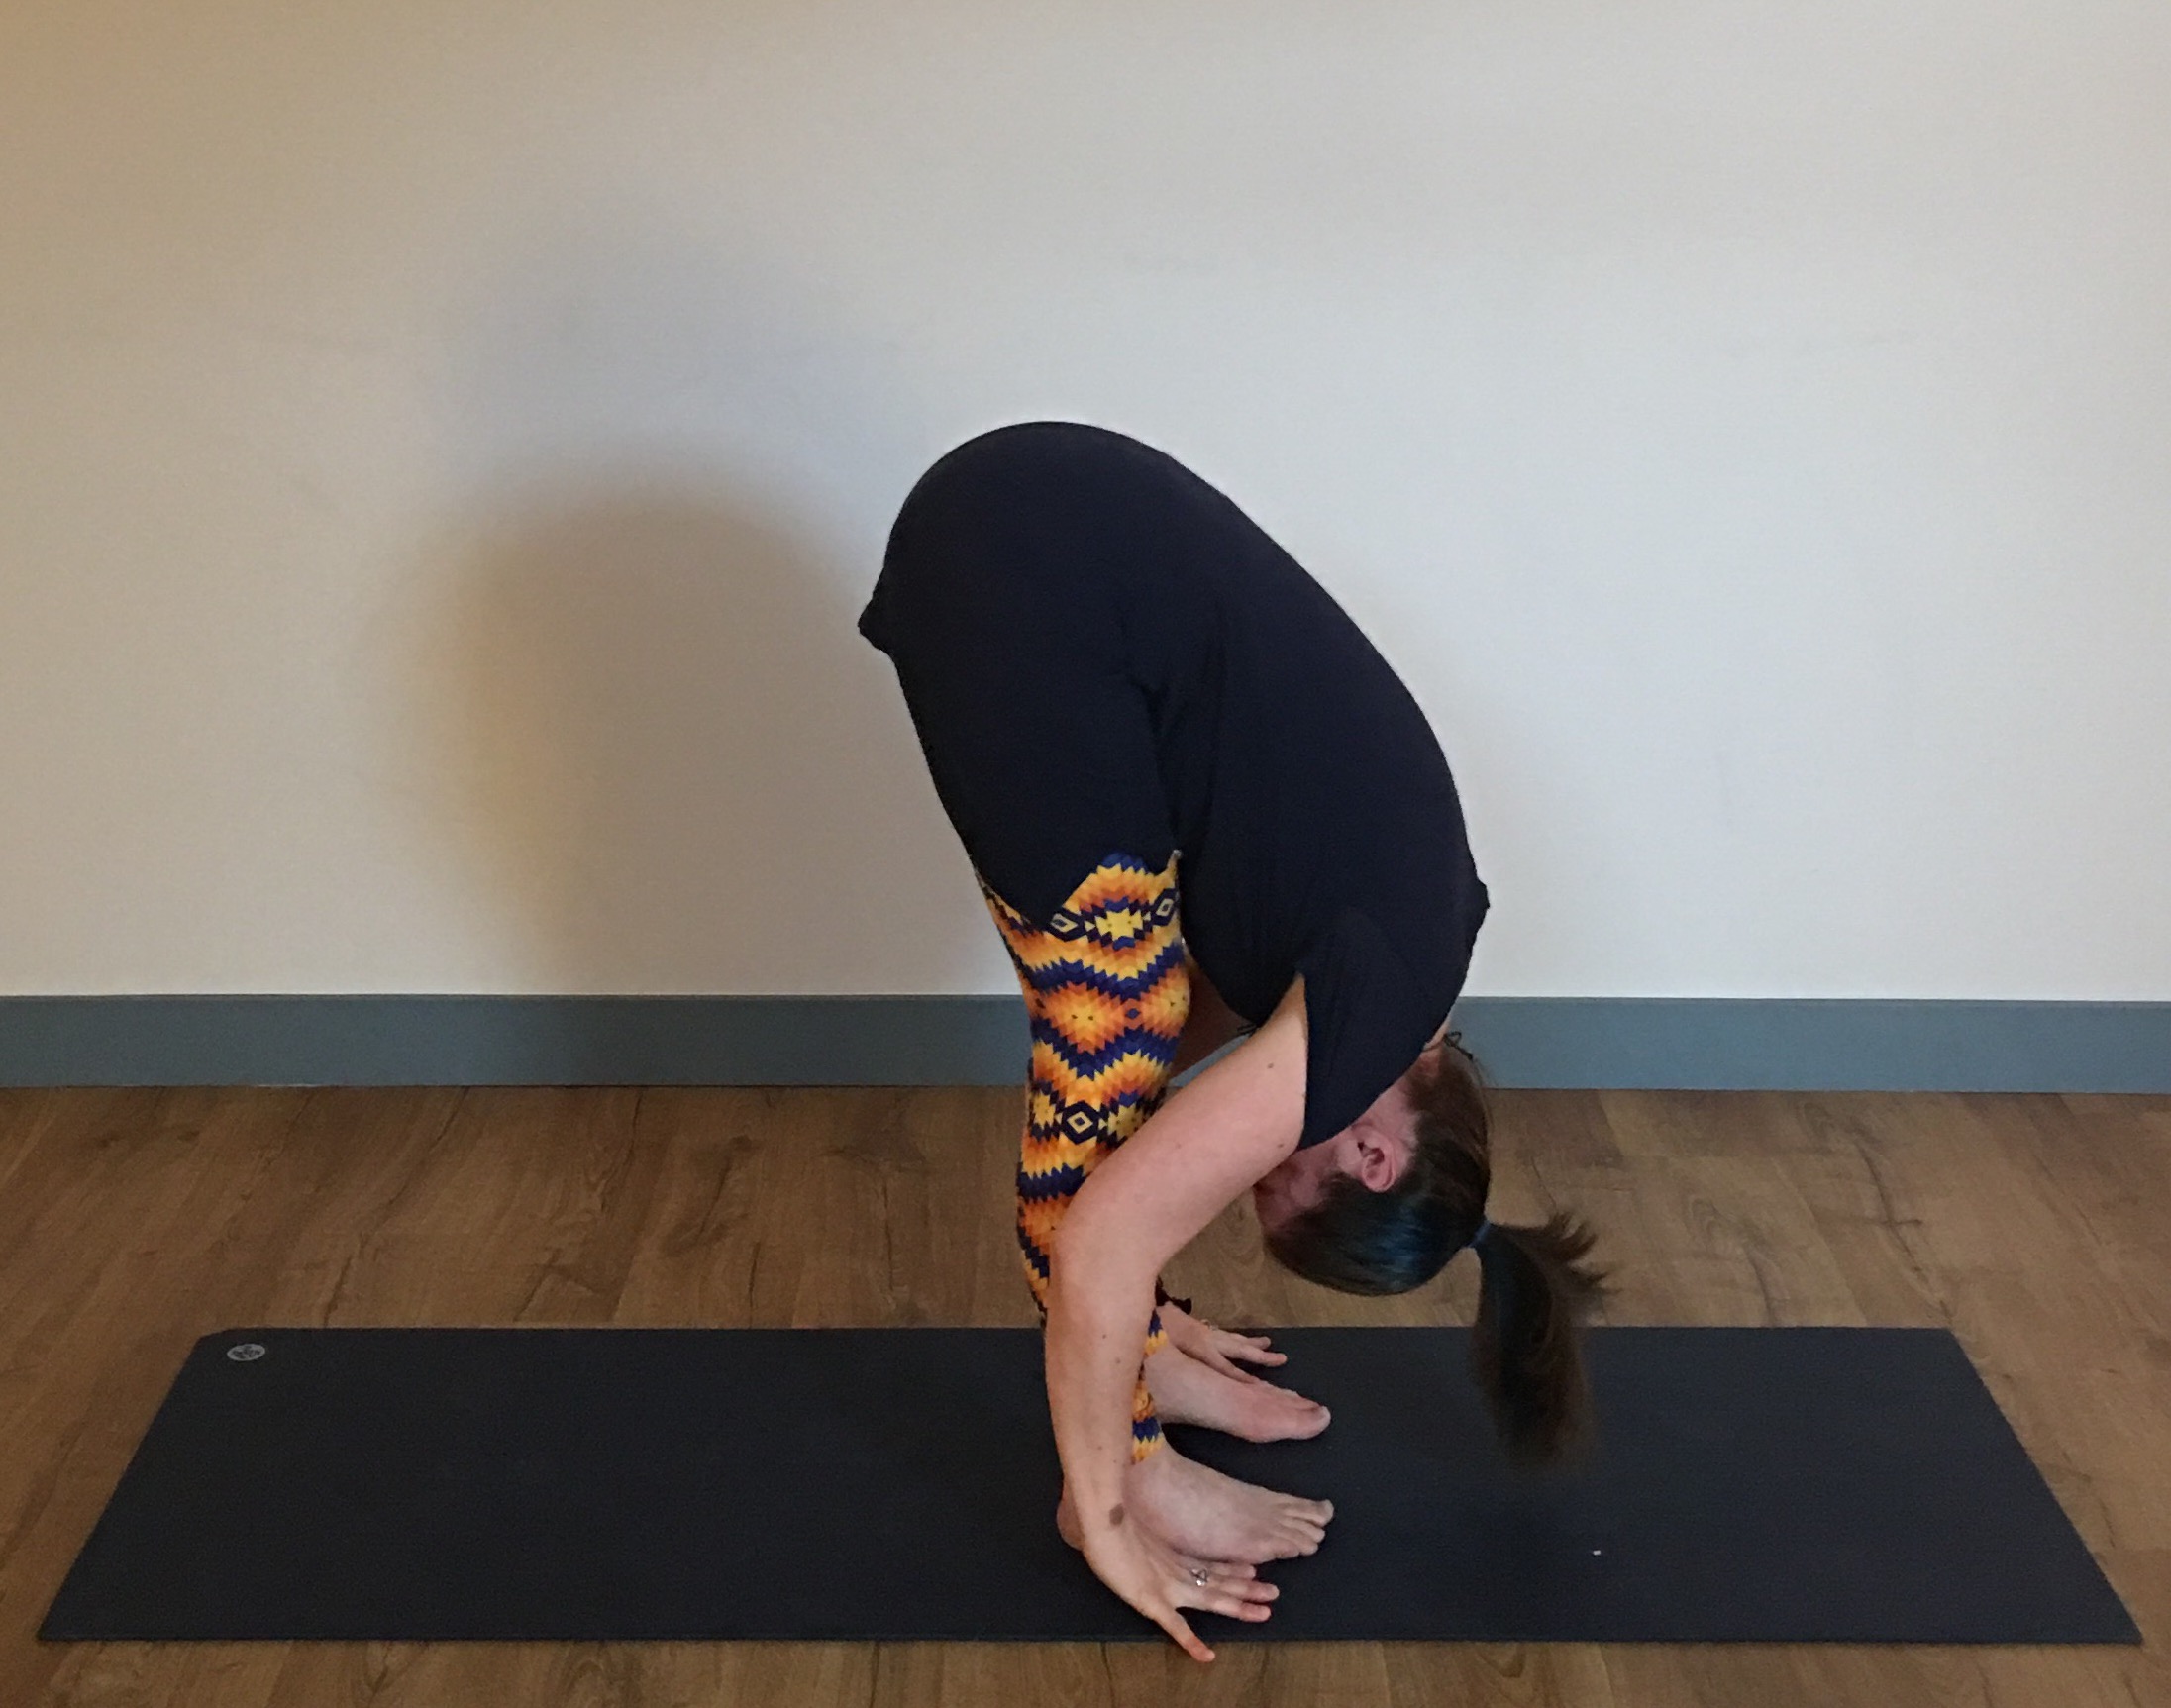
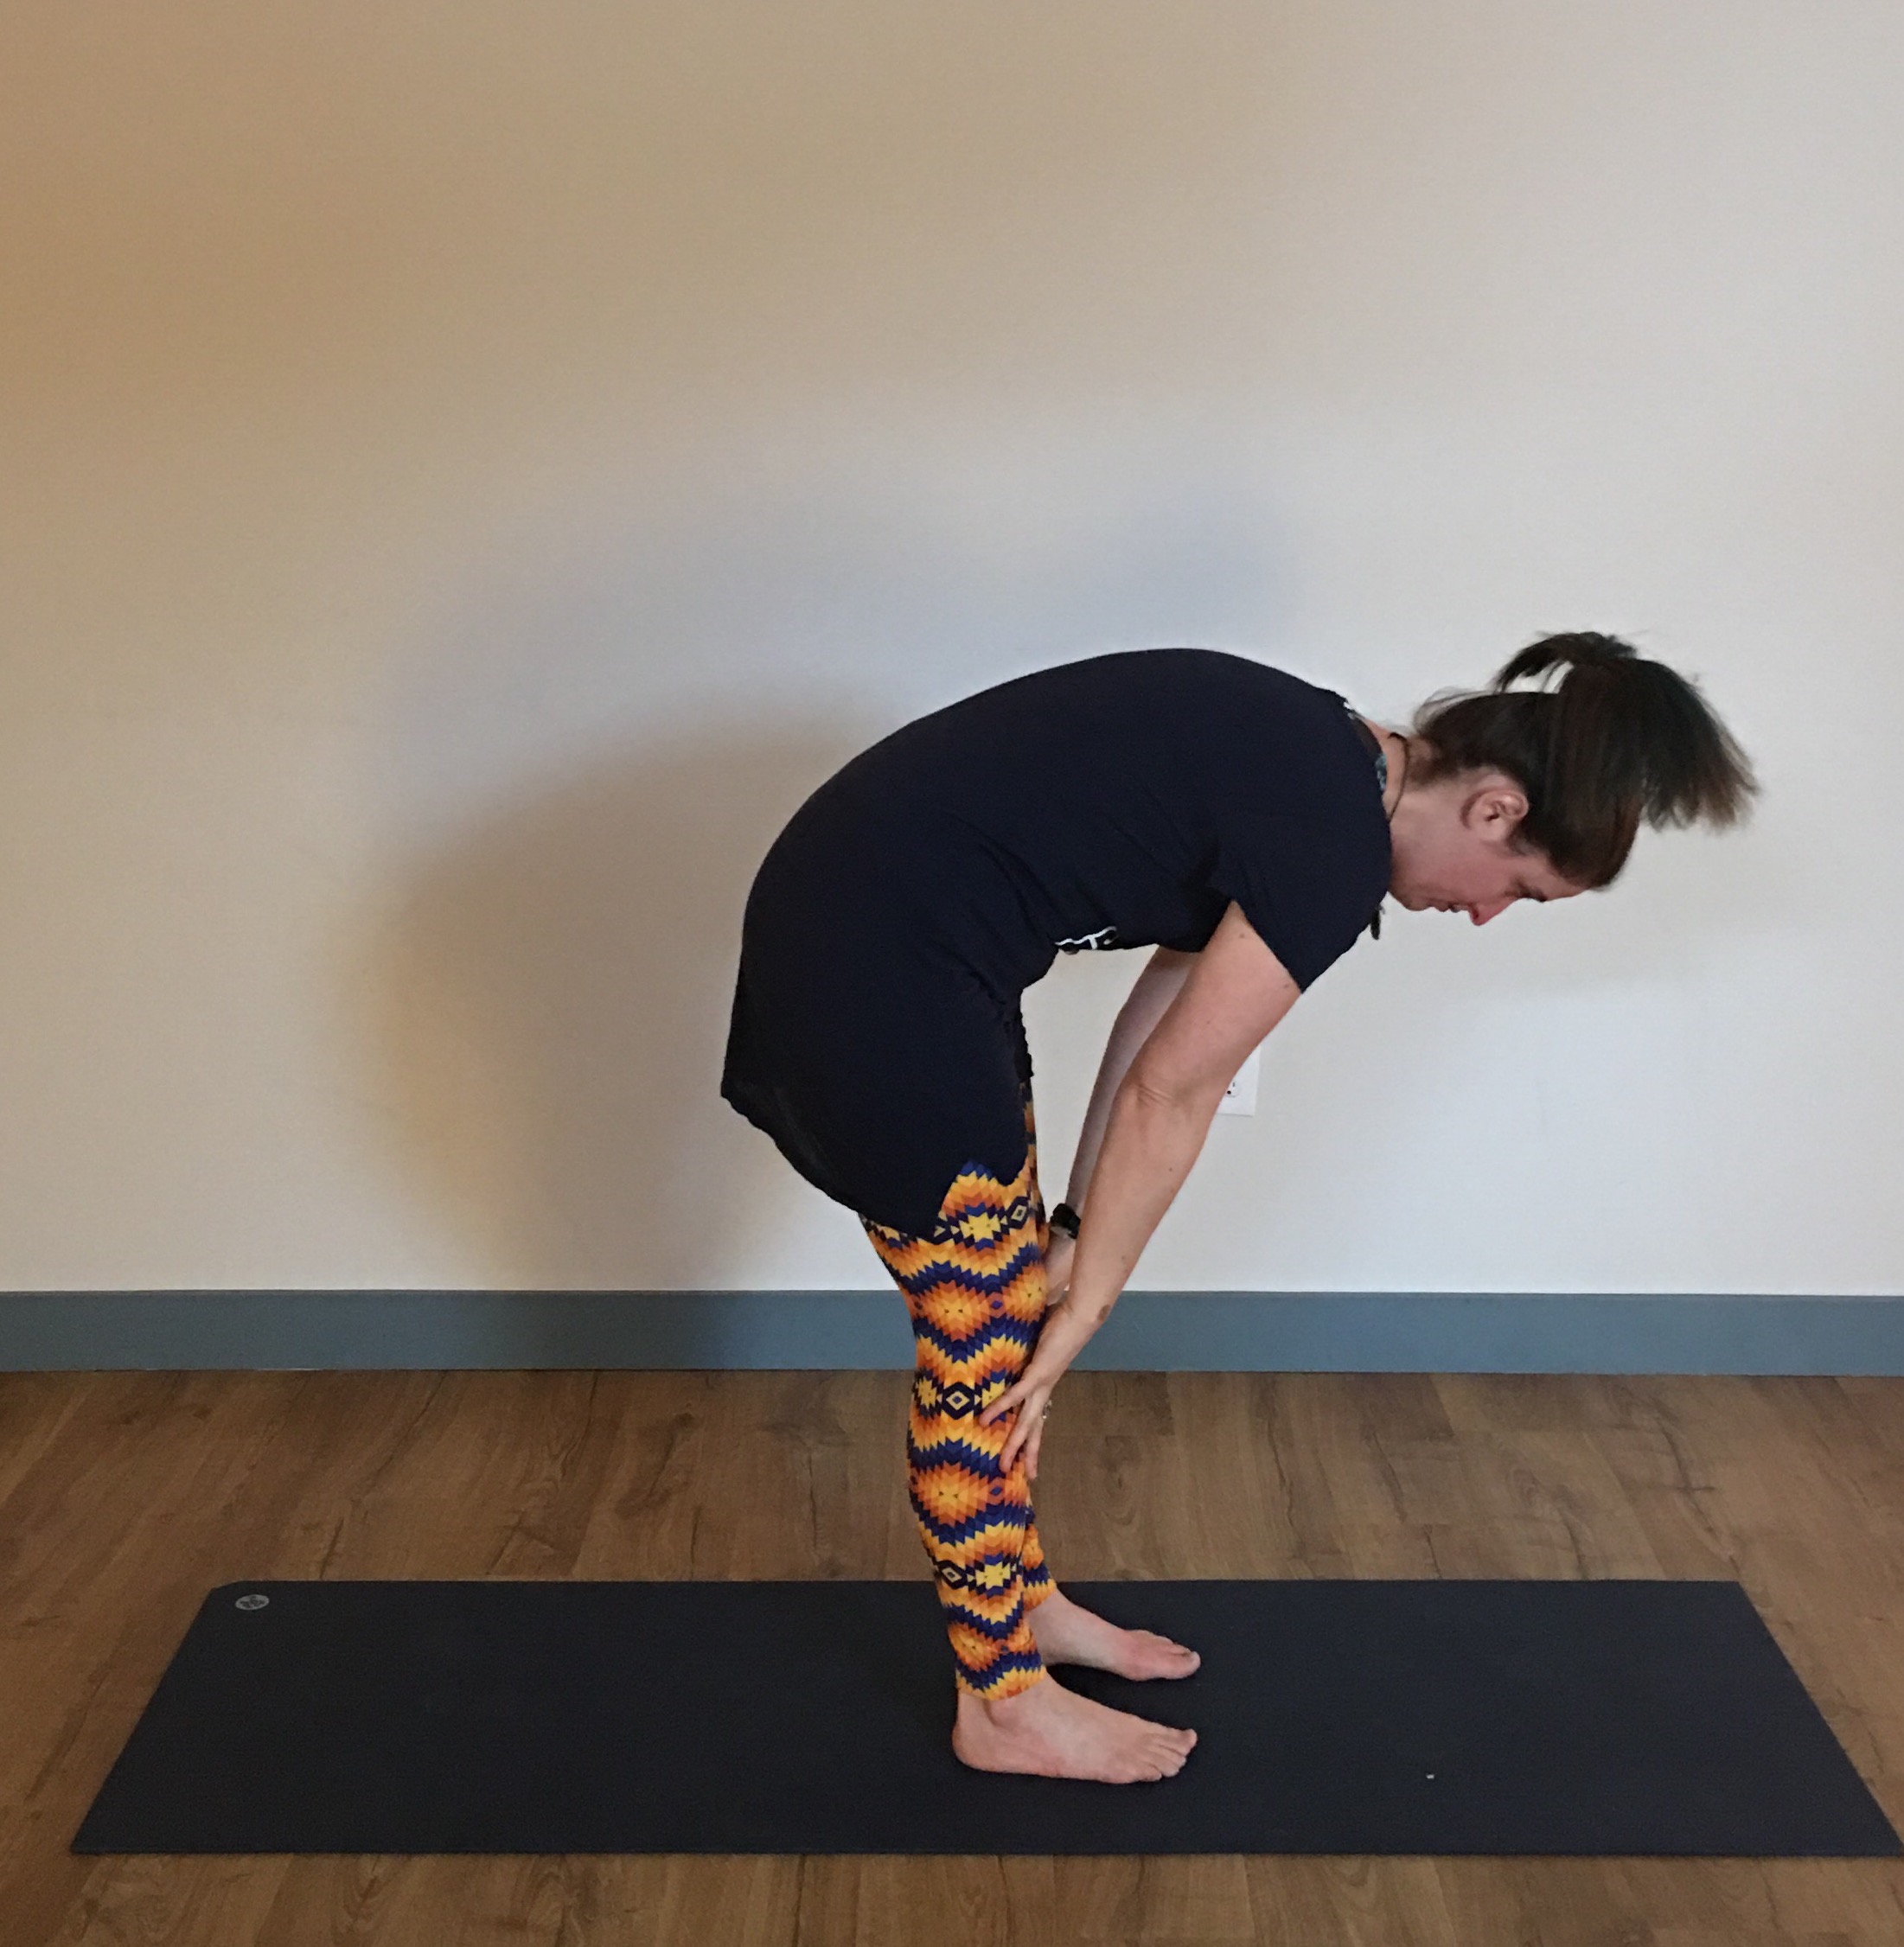
Also, when I look at the center line of my foot, it is offset compared to my pelvis. I can tell because when I feel my hip points (the two bones you might be able to feel if you palpate the front of the pelvis), if I were to draw a straight line down to the center of my foot, that line hits more towards my outer ankles. So instead, I take my feet “sit bones distance apart” (I often have people measure this by bending forward and taking two fists together between the arches of the feet. It seems to work well.) which gives me a broader base and more appropriately aligns my body. So it would look more like this:

With this broader base I’m more able to hold my ground, or be more firmly grounded in this pose that is supposed to embody stability.
This wider foot placement in Tadasana also translates into other common standing poses. Tadasana, is after all, the foundation for every other yoga posture. Take Warrior 2 for example. Here’s what the traditional foot placement would look like:

You can see from the lines on this mat (thank you Liforme!) that the heel of the front foot would have bisected the arch of the back foot. (I have also heard it described slightly wider, so that the heel of the front foot would have lined up with the heel of the back foot in traditional teaching.) This might give a practitioner with wider hips a feeling of, what I often call “walking the tightrope”; the base of support is too narrow to be stable. This often shows itself not while the practitioner is in the pose, but when they are making the transition up into the pose from a lunge, for example. There’s a wobble that happens in that transition and I’ll often see students reflexively step the back foot wider to catch themselves! What they’re instinctively doing is creating a stance more like this:

This comes into play again when we look at Warrior 1. Again, the more traditional placement would look like this:

But for many bodies, this foot placement becomes problematic when the practitioner attempts to make the transition into the pose from a lunge and/or places unnecessary forces into the knee joints in particular as the pose is held. With Warrior 1, as the pelvis rotates toward the top of the mat, the narrow stance may not allow for much rotation. With the pelvis unable to rotate and force still being applied (a discussion for another day), that torque has no where to go but to the next available joint, which is the knee. Unfortunately for our poor yoga student who is fighting to do what is asked, the knee is a hinge joint and does not lend itself to rotation. Chances are, they feel this as something happening IN the joint, a thing we typically want to avoid in a vinyasa yoga practice. This can all be avoided by stepping the feet wider like so:

With the broader stance pictured above, there’s greater freedom for the rotation of the pelvis, the integrity of the knee is no longer questionable and there will be a greater sense of stability in the pose overall.
What Does This All Mean for You?
To apply what you’ve learned here you might take the time to experiment with these different foot placements outside of a class. Start with Tadasana and see how your body feels with the two different foot placements. Depending on your specific body type and shape, you may find one that feels more stable and easeful than another. Then do the same experiment with Warrior 2 and Warrior 1. Take the time to really notice the effect on the joints of the legs in particular and your sense of stability. Do you feel like your “walking the tightrope” or if a strong breeze came by would you be steady? As with anything in yoga, the proof is in the experiment within the laboratory of your own body, life and practice!
I’m considering offering a workshop on this topic in the near future. If you’d be interested in such an offering, let me know in the comments below or send me an email!
If you’d like to experience a group class with me where I teach this more modern interpretation, check out my schedule for an upcoming vinyasa yoga class.
If You Enjoyed This Post You May Also Like…