
Tech Advice for Getting the Most Out of Your Online Yoga Class
/I’m taking a break from posting about the specifics of your yoga practice today to give you some tech help. Online Yoga is here to stay. Even when we’re able to go back into spaces and safely gather together again, the conveinience factor for online yoga alone is likely to make it a part of our yoga practice far into the future. But if you’re straining to see a small screen or your teacher can only see your ceiling, you might not be getting the best experience from your Online Yoga Class. Here are a few ideas from a technological perspective that might help you get the most out of your online yoga experience and calm your fears about diving in if you haven’t done so already.
First, let’s talk devices. Did you know that you can do your online yoga practice from nearly any device? Zoom has apps for phones and tablets as well as laptops, desktops and everything in between. It can also be used through any web browser such as Chrome or Safari. You can use it on Apple and Android devices as well and your account will work across multiple devices. Most other platforms have multiple device compatibilities as well. Perhaps this is obvious to most of you reading this, but we wanted to be sure you knew that you could use nearly any device.
Second, the bigger your screen size, the better your viewing experience will likely be. You may want to try casting to your TV or directly plugging into your TV or other monitor. Here’s where we get into some nitty gritty details in the tech, so hang with me here. There’s typically two ways of taking what you’re viewing on your smaller device (like a phone or tablet) and making it work with your TV. Whether or not either of these will work will have a lot to do with how old your TV and your device are and if they are on similar operating systems. Let’s talk about these two ways individually. First up:
Casting or Sharing Your Screen
These are terms for wirelessly transmitting the sound and video from your smaller device to your TV. This can be accomplished through your home WIFI network or with the help of additional devices such as an Apple TV, Chromecast, or Smart TV such as a Roku or Fire TV. To do this, make sure your TV is attached to your home WIFI network. If you’ve been streaming Netflix that’s probably already happening. The next steps depend on whether you’re using Apple or Android devices.
For Apple devices including a Mac computer, you can share your screen using Airplay. You can do this with a compatible Airplay device (such as Roku, Smart TV or adapter) or an Apple TV, which is another box to plug into your television. Follow the instructions that come with it for connecting it to your TV. Once that’s done, make sure your phone or tablet is connected to your home WIFI network. Then go into the Settings on your Apple product and look for “Screen Mirroring” or “AirPlay”. Once you open that, your Apple TV should show up in the list of available devices. Click on it and you will see whatever you had been working with on the phone show up on your TV. If you’re using Zoom on a Mac, you’ll have to set your speaker choice to Apple TV to hear sound on your TV.
For Android and Samsung devices, you can use a Chromcast to share your screen. Some TVs will come with this built in nowadays. With older TVs you’ll need to buy an additional device, similar to Apple as described above. Once you’ve connected that to your TV following the instructions that came with the device, you’ll follow a similar procedure as above for connecting. On your Android device, go to the Settings menu, click on the Cast icon. Then choose the TV or Chromcast you want to connect with.
For PCs running Windows 10 you can share your screen using the Connect function in your Settings panel. You may be able to Cast directly to a Smart TV or Chromcast Device or by using Microsoft’s wireless display adapter.
Remember, with any of these options the camera on your device will still need to be used so I can see what you’re doing during your class. More on this below.
Direct Plug In
This is my preferred method because it’s typically more reliable and easier to manage. You’ll need a couple of things to make it work. The first is an HDMI cable. You can get one of these inexpensive cables from the typical big box stores like BestBuy or Amazon.
One end is going to plug directly into your TV through an HDMI port. They are often labeled as such but they typically look like this:

HDMI Input on Back of a TV
The other end is going to plug into your device. Many computers and laptops will have an HDMI out port on them somewhere but phones and tablets will not. For those smaller devices, you’ll need to purchase an inexpensive adapter such as this:

Various Adapters
When you plug into your TV, you’ll be able to control your zoom meeting on your device, but you’ll see a much bigger picture of everything that’s happening on your phone on your TV screen. You can do this same thing with a big external computer monitor as well. Just look for the HMDI port on the back of the monitor and use the same adaptor on your phone or tablet. (Adapters are also available if your computer does not have an HDMI port or if you need to connect to a monitor using USB-C, VGA, DVI, or Displayport.)
Audio controls
If you’re using Zoom on a computer, you’ll have more choices on how you can hear and be heard on your device. There’s a little microphone icon on the screen while you’re running Zoom. Click on the little arrow next to it to explore your options.
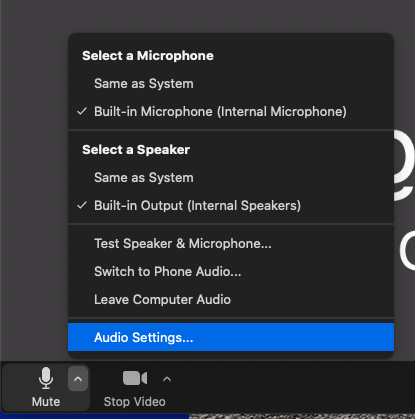
Zoom Audio Settings Menu
If you are using a phone or a tablet, some of the audio settings will be available by changing your zoom account settings. You’ll need to access zoom’s website from a browser on either a computer or other device to change these settings. Connecting an external device such as a bluetooth speaker or wireless headphones may be an available option through these or your device’s settings.
A Note About Hearing Aids
I’ve had a couple of students who have bluetooth capable hearing aids tell me about sending the audio for these classes directly into the hearing aids. Basically, the hearing aids are connected to your smartphone (I think the hearing aid companies typically help with this setup, but I imagine it’s the same as connecting any two devices together via bluetooth) and so instead of using the audio on the computer or tablet, you would choose to “call in to the meeting" with your phone when you enter via Zoom. If you do this, be sure to mute the audio on the computer or other device or you might get some unpleasant phasing of the audio (the delay in the audio being heard on your computer will be different then in your hearing aids) or feedback (just like when you accidentally aim a microphone at a speaker). You may also be able to pair your hearing aids to your device directly. We aren’t experts on this one at all, so I’d advise you to talk to your hearing aid provider about this if you have questions. I just wanted you to know this was possible!
Help Me See YOU!
Now that you can see and hear me better, time to make it easier for me to see YOU! My interactive livestream classes are meant to allow me to help you since it’s a two way system. I’ve made jokes lately that I’m getting used to only having half of you visible at any time, but it doesn’t have to be that way! Here are a few ideas to help me see you better.
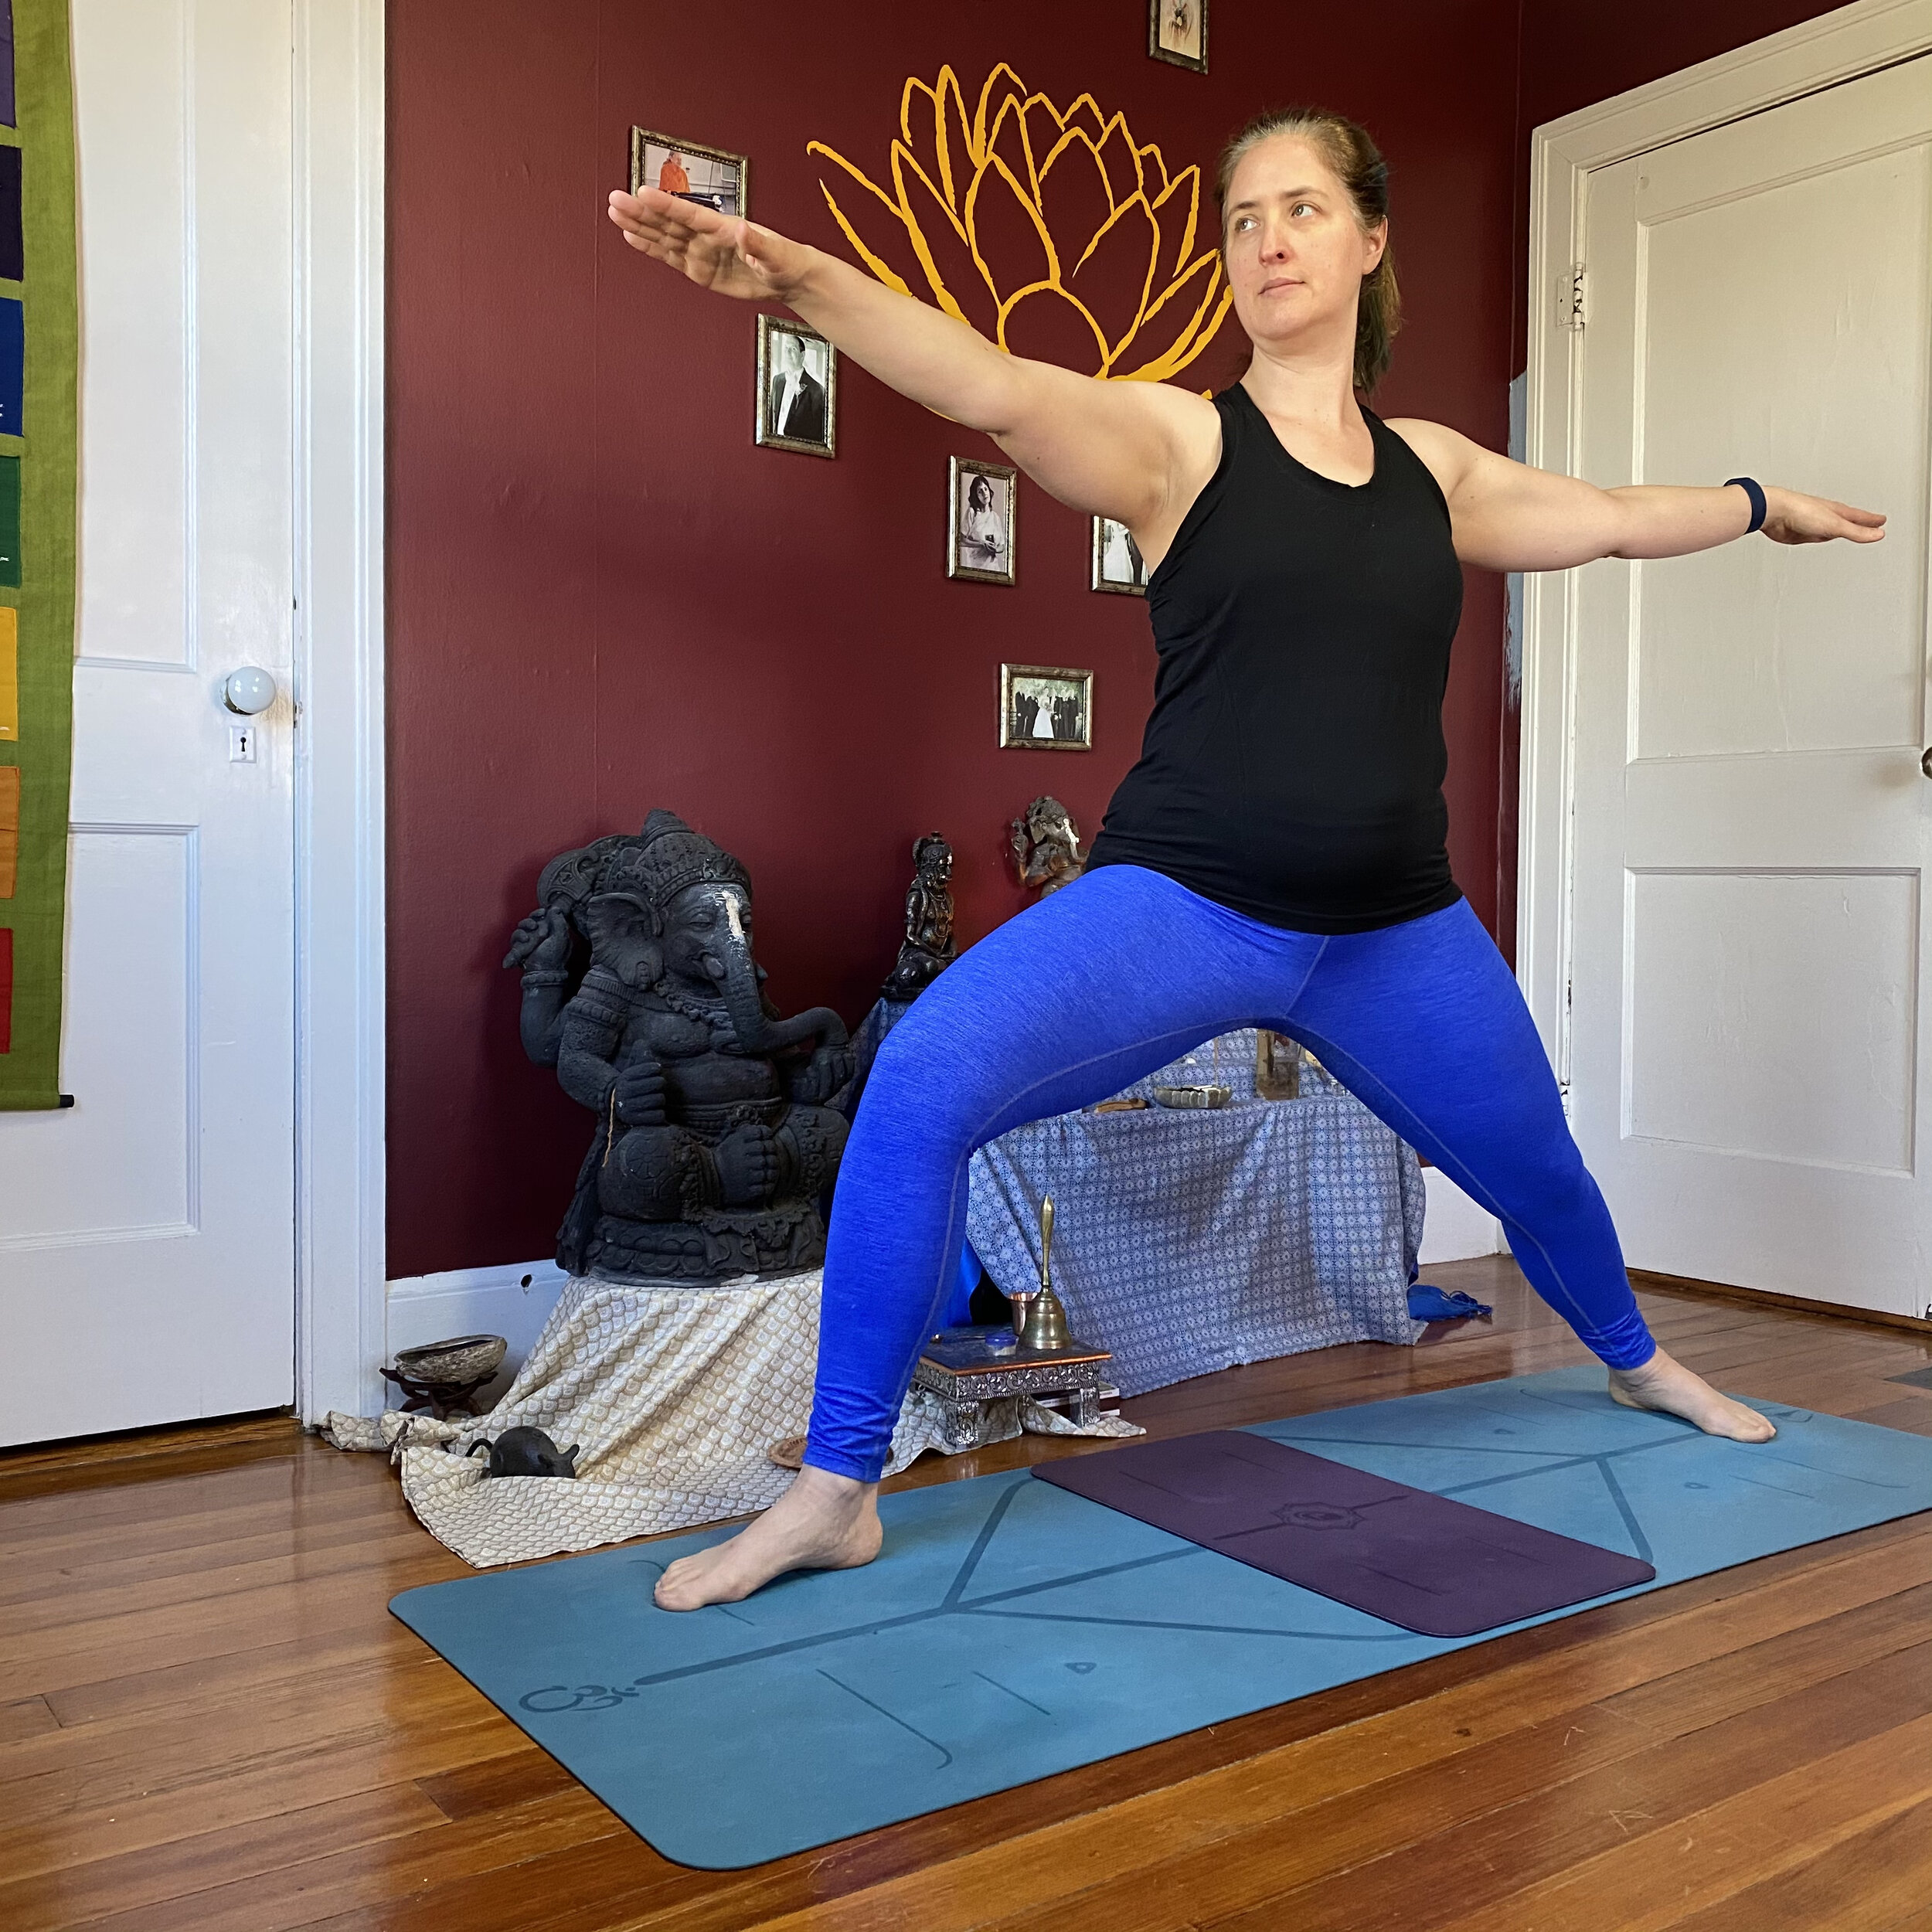
Now that you are using a bigger screen to see me, the device you're using and the camera on it can be farther away from you. That will give me a better picture of your whole body and is a really good start.
Ideally, you’ll place your camera so that I can see you from the long side of your mat, with the full length of your mat in view from floor to ceiling. I’m talking about something similar to the view I provide you of me. Something like this:

3. If a full view from the side isn’t possible, a small angle can also be helpful for me. It allows me to see a little bit of what is going on on the side of your body that is facing away from the camera. Something like this:
4. Depending on how far away your device can be will often determine how much of you will be in view from floor to ceiling. From my perspective and from what I’ve learned over the last several months of teaching this way, if your whole mat and body are in view, but I can’t see your arms when your standing and reaching up, that’s better than if I can’t see your legs and feet. Opt for a camera angle that gives more of a view toward the floor than the ceiling if possible.

Making sure I can see your feet more than your arms will help me help you!
I certainly hope you found this post helpful. I’m happy to provide a bit of tech support for you for my livestream classes and private lessons if you feel like you still have questions. Feel free to email me to let me know what specific devices you might be using or would like to use. We can even set up a time outside of class to test things out and make sure they’re working for you, to talk about camera set up and other issues as well.
Many thanks to my husband Justin (who often gets referred to as the I.T. Guy around here) for his help in making this post possible.
[Links in this post are for clarity and convenience only and are NOT affiliate links. We always encourage you to support your local small businesses whenever possible!]
If You Enjoyed This Post You May Also Like…


