6 Poses to Free Your Breath

6 yoga poses to free your breath.png

“The Breath Is Life Itself.”

I heard Sharon Salzberg say this recently in an online retreat. That’s certainly the view that the teachings of yoga present to us for consideration. The breath fuels everything from the fire of our digestion to the urge to eliminate to the length of our time here on earth according to the sacred texts. The circumstances of the last several months may have our breath feeling less than free and open for a variety of reasons including fear, stress, and sitting at computers more and more. If you find yourself unable to take a deep breath lately because your holding so much tension around your lungs and ribs, consider working with this simple sequence to bring some balance and freedom to the area.

As you approach this sequence you might look at it in one of two ways: 1) A series of postures you can hold for a couple to several breaths each or 2) some points to emphasize in the context of a flow. Either way is perfectly valid and will allow you to find some benefit. You might experiment with both ways depending on your energy level and the time you have to work through the sequence. Let’s look at each pose in turn and I’ll give you some options.

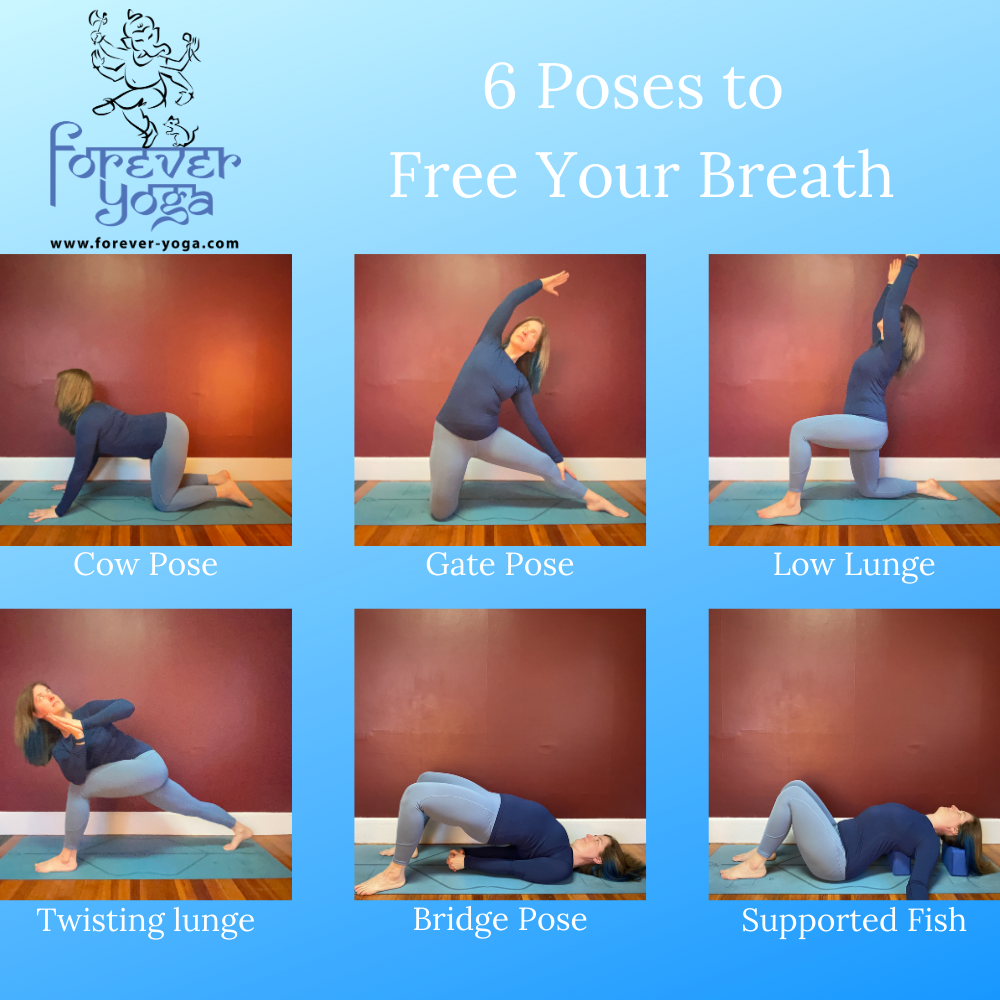
Cow pose - We don’t often see this posture without it’s complement, cat pose, but it certainly has merits on its own in the context of this sequence. As you move into it bring some emphasis to the feeling of broadness it may create through the front of the chest. I’ve heard some teachers talk about “pulling the chest through the shoulder blades” as you inhale into it and that certainly draws a good mental picture. Hold this one for one to several breaths or make it more dynamic by adding cat pose on each exhalation.

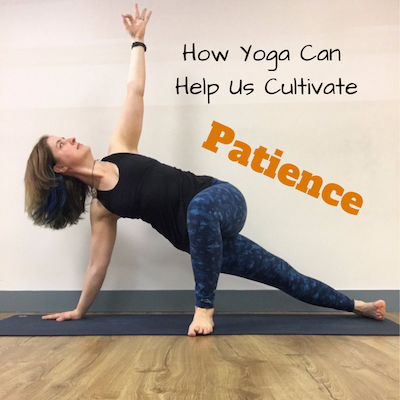
Gate pose - This posture creates a deep opening through the side body that may be felt not only through the rib cage but perhaps even up into the arm pit or down into the belly, hip and the standing leg. This is an area where many of us have considerable constriction. This can inhibit the breathing because the ribs aren’t as able to lift and separate from each other to create the space for deep breaths to enter the body. In our daily lives most of us don’t lift our arms into this position more than once a day on purpose! You might consider some padding under the standing knee for this one if your knees are at all tender. Be sure to do both sides!

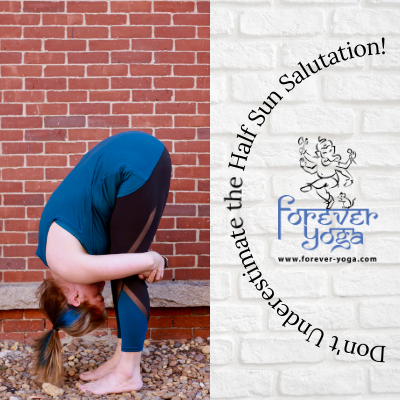
At this point you may want to bring in some half sun salutations or some lunging salutations to warm the body and bring in some demand to the breath intensity, or as I mentioned above, you might just move into the next posture.

Low lunge - Bring careful attention to the alignment of this posture as I have it pictured here. Many practitioners come into the posture with the hips forward and down a great deal more with the front knee often coming past the ankle. In this version, I am purposely drawing a line from my hips straight down to the lower knee. The torso stacks on top of that and there may even be a little backbend here. Also important is the top of the back foot pressing down firmly into the mat. The overall effect of these details is a great deal more length on the front side of the body, especially through the hip flexors which are often tight and short. What does that have to do with the breath? I can almost guarantee that as you’re reading this, you’re sitting in a chair and perhaps a bit hunched forward. 😉 Try to take a deep breath in that position. Yeah, it doesn’t work so well. Now, sit up tall (even better, stand up and do this) and you may notice a subtle but tangible difference. Front body space allows for deeper breaths. It also prepares us for a real backbend. But first…

Twisting lunge - There is a whole network of long, rope-like muscles that run up and down the length of our spines. It’s a place where many of us hold tension we don’t even notice and many of these muscles tend to be under a great deal of stress because they’re over stretched. Twisting can relieve this tension in these muscles while also bringing length to some of those side body muscles that wrap the ribs and abdomen that we touched into earlier in this sequence. With this one you can always simplify by dropping the back knee to the floor. Also consider allowing the pelvis to turn into the twist and work together with the spine.

Bridge pose - There are so many benefits to this pose, but for our purposes here let’s focus on how this frees the breath. With the hands interlaced behind the back as pictured, there’s a great opportunity to broaden through the front of the chest. As the hips lift, nearly the whole front side of the body is opening as well. Additionally, with the hips above the heart we have a slightly inverted relationship with gravity. This gives us a chance to exercise the breathing diaphragm, an essential muscle of respiration that moves down toward the feet when we inhale and up towards the head when we exhale. In this position, instead of working WITH gravity as it normally would when we’re upright, it’s working AGAINST gravity (just a little bit) and you may actually find yourself having to work a little harder to take an inhale. It may be quite subtle, but this is good exercise for a muscle we don’t often consider strengthening in most forms of physical movement.

Supported Fish - Our last posture is one that when well adjusted can be quite restful and allow us to take advantage of the space we’ve created in the body for our breathing throughout this sequence. You can use two yoga blocks, one behind your skull (that’s important!) and one behind your heart. Depending on your experience with this posture and your flexibility, you might want the one behind your heart on the lowest level and the one behind your skull on the highest level or some other combination. You can also do this by rolling or folding up a blanket and laying back over it with it landing behind your heart, just below your armpits. Whichever option you choose, allow your arms to come out to the side and turn the palms up for more space through the front of the chest. Once you’ve settled in and gotten comfortable, this is a great place to linger and focus on your breathing. I like to imagine my breath coming in through the nostrils and down to the base of my spine and then filling my torso right up to my collar bones with breath and then allowing all the breath to release in reverse. Stay for a few breaths or several minutes and enjoy all that freedom you created!
You’ll find many of these postures in my vinyasa classes this month. If you can’t join me for the Livestream consider signing up for my new On Demand Video Membership through Patreon.


If You Enjoyed This Post You May Also Like…

The Ridiculous Looking Yet Highly Effective Breathing Practice to Keep You Cool This Summer

The Ridiculous Looking.png

While it might look a little silly, Sitali breath can be a powerful breath for use in the summer when we might be overwhelmed by the hot and humid conditions that tend to pop up here in NH. I used to use this breath a lot when I was working in NYC in the summertime. As the 90+ degree heat radiated off the buildings and the streets I was often passed by buses and cars spewing hot exhaust while I briskly walked (near ran sometimes) the 10 blocks from my office to Penn Station to catch the train home. When I remembered to use this breath, I didn’t even break a sweat! If it can work under those conditions, with a little practice, I’m sure it can help you!

Here’s how to do it:

Sit comfortably, allow your mouth to open, stick out your tongue a bit and curl it into a straw that you’ll sip your breath through. This is an ability ruled by genetics, so if you can’t do this, just let your tongue lay low in your mouth broadly and relaxed.

Slowly inhale through your curled tongue or over the surface of your relaxed tongue.

At the end of your inhale, retract your tongue back into your mouth and exhale slowly through your nose.

That’s one round.

Repeat this process 3-6 times. When finished, breathe normally and notice how much cooler you feel. You may even get goosebumps when you’re doing this!

You can use this breath during a yoga practice if the heat catches up to you, on a hike, or any time you’re feeling overheated. If you’re experiencing some of the signs that the summer heat has settled into your tissues like a red rash, irritability or digestive issues like indigestion, you might add this breath to your regular practices. If you’re having the hot flashes associated with menopause, this can be a great breath to have in your tool kit as well.

I hope this helps you stay cool this summer! Let me know if you have any questions!

If You Enjoyed This Post You May Also Like…

The perfect breathing practice to relieve stress and anxiety

In all my classes this month we are focusing on our breathing. Breathing and yoga go together like bread and butter, but it can take a bit of practice to make it all work. The overall effect is a calmer mind and body when done well. While the breathing practice we try to maintain during a vinyasa practice, called ujayi breath, is wonderful calming breath, if you’re experiencing stress and anxiety there’s another one should should really consider practicing.

That breath is alternate nostril breath.

I often say I wish I had known about this breath when I was auditioning for orchestras when playing the bassoon was the career I thought I’d spend my life in. The anxiety of that experience always left me with shaky hands, a dry mouth and not much in the way of coping mechanisms to work with that bodily state other than taking more auditions. Now, I use this breath any time I’m experiencing stress or anxiety. The key though is to have an established practice. Only then will you remember to do it in your time of need.

Alternate nostril breath is said to balance the energy channels on the two sides of the body. Those energy channels just happen to coincide with our two nostrils. The right side is said to be the more energetic side, the left side is said to be the more calming side. By doing this breathing practice you are bringing those two sides into greater balance and harmony. The effect can often be felt after just a few repetitions.

Here’s how to practice this breath:

First, choose a hand position that works for you. I usually offer three different possibilities. The first is Vishnu mudra. The first two fingers are curled into your palm. You use your thumb and the last two fingers to alternately open and close the nostrils. It looks like this:

IMG_0194.jpg

The second possibility is to instead take the first two fingers and anchor them at your third eye space or the space between your eyebrows. Just as above, the thumb and pinky fingers are then free to open and close the nostrils. That looks like this:

IMG_0216.jpg

The third option is to just choose to do it however is most comfortable for you! That might look something like this:

IMG_0202.jpg

Once you have a hand position that works for you you’ll then follow this sequence to perform this breathing practice (these instructions assume you are using your right hand):

  1. Close the right nostril with your right thumb and inhale through the left nostril.

  2. Immediately close the left nostril with your right ring finger and little finger, and at the same time remove your thumb from the right nostril, and exhale through this nostril.

  3. Inhale through the right nostril. Immediately close the right nostril with your right thumb and exhale through the left nostril. This completes one full round.

You’ll continue this sequence for about 3-6 rounds to start. Allow the breathing to be slow and deep without being forced. Always end with the exhale through the left nostril (remember how we said this was the calming side above? That’s why. We want to end on a calm note!).

When you’re finished, take a few breaths through both nostrils and take the time to notice the effect of your practice.

If you are experiencing congestion or there is a blockage in the nostrils best not to try to do this breath. If you’ve been practicing it for a while, imagining it can be highly effective as well, but you first need to have an established practice.

You can practice this breath a couple times a day for a couple of rounds to start out. Over time as it becomes more comfortable, you can extend how many rounds you do at once. With time and practice you’ll notice a greater calming effect. You may also find this breath helpful in times when your energy is feeling low. The balancing quality of the breath works the other way as well.

Did you find this helpful? Do you practice this breath regularly? Do you have questions about this practice? Let me know in the comments!

Tools to keep you cool during the summer

Tools to keep you cool during the summer.png

Seemingly overnight we've gone from the depths of winter to summer heat and humidity here in southern NH. While some may love this time of year, it's important to consider that the heat and humidity can take its toll on our bodies just has much as the cold of winter. As always, yoga has an answer for managing these changes but we should also consider science as well. Here are a couple of things I've learned from yoga and hiking that can help you manage how you feel this summer!

As many of you know, I've been doing a lot more hiking this year than I have in the past. I've always had a love for the outdoors but for a variety of reasons I've been limited in what I could do. With some new knowledge and new equipment I've been able to get out more and really enjoy being out there. But with the heat of summer comes one big challenge that we have to consider - hydration.

People talk about staying hydrated all the time, but did you know it isn't just about drinking water? And did you know that you can actually drink TOO MUCH water? While drinking water is very important and increasing your intake is necessary, especially if you are engaging in any challenging physical activity like your fast sweaty vinyasa yoga class or hiking a mountain, it isn't the only thing to consider. We also need electrolytes or we run the risk of potentially experiencing a condition known as hyponatremia. Hyponatremia occurs when the level of sodium in your bloodstream is too low. In rare cases it can be fatal. Many factors can be involved including medications you may be taking, but drinking too much water can also be a factor. Consider following this advice from the Mayo Clinic (full article linked above):

“Drinking water is vital for your health, so make sure you drink enough fluids. But don’t overdo it. Thirst and the color of your urine are usually the best indications of how much water you need. If you’re not thirsty and your urine is pale yellow, you are likely getting enough water.”
— https://www.mayoclinic.org/diseases-conditions/hyponatremia/symptoms-causes/syc-20373711

I've also had good luck with adding these tablets to my water recently. They have less sugar than typical "sports drinks" and fit into my yogic diet requirements. They're pretty tasty too! And just for the record I don't receive any money from these guys for an endorsement. ;-)

Yoga of course helps us manage something like the potential for Hyponatremia by being more aware of our bodies and recognizing more quickly what we need. But it also has a breathing practice that can help - Sitali!

To do Sitali breath you'll start by curling your tongue into an O shape like this:

If you're going to put a ridiculous selfie on the internet, at least include Ganesha!

If you're going to put a ridiculous selfie on the internet, at least include Ganesha!

If you can't do that don't worry! It's totally genetic. Either you can or your can't. If you can't, just let your tongue rest low and flat in your mouth instead.

Once you've got the position of the mouth you simply INHALE through the O shaped tongue or the open mouth over your flattened tongue and EXHALE by closing your mouth and breathing out through your nose. Do this several times and you will start to feel the cooling effect! I used to use this breath when I worked in NYC and had a 10 block run/walk to the train station in 90+degree weather like we're having now and didn't even break a sweat!

Give it a try and let me know in the comments if it works for you!

Spring Cleaning with Deep Breathing!

Spring Cleaning with Deep Breathing!

Spring is in the air (or at least it is on the calendar... gotta love New England!)! You may be feeling the stirring of wanting to get out side, in the garden or out on the hiking trail. You may even be thinking about doing some spring cleaning inside your home, releasing the clutter that may have built up over the long cold winter.

Read More
1 Comment
Disclaimer: Not all yoga poses are suitable for all persons. Please consult with your health care provider and obtain full medical clearance before practicing yoga or any other exercise program. The information provided in this blog is strictly for reference only and is not in any manner a substitute for medical advice or direct guidance of a qualified yoga instructor.

A breathing technique for controlling stress and anxiety

I continue to hear from many of you that controlling stress and anxiety and taking care of yourself are a main focus for 2018. You are not alone! This is one of the wonderful things about marking a new year; we get to rededicate ourselves to something important. 

Here's a simple breathing technique that might help. We tend to think that in order to help ourselves the solutions need to be complicated or involve a complex sequence of steps. The truth is that it can be as simple as conscious breathing. That's not to say that you'll never be stressed out again if you do this technique! As we all know, life happens! But what we can do is make sure our toolbox is full and our practice is steady so we can reach for the right tool in that moment of anxiety.

Here's how it works:

breathe.jpg

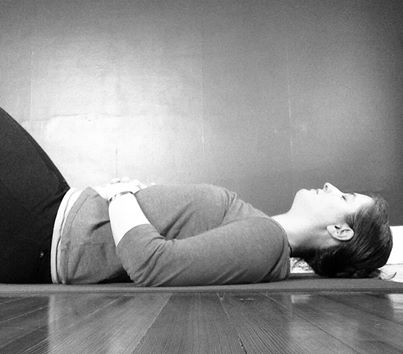
Lay on your back with one hand or both hands on your low belly just as you see above. Do your best to breathe through your nose, but know if you're a bit congested you can always breathe through the mouth. Close your eyes if comfortable and focus on your breath. As you breathe in, direct the breath down into the hand on your belly and allow your belly to expand so it lifts your hand up to the sky. As you exhale, let it all fall back toward the earth. Continue like this for several breaths. It may take a few tries to get your belly to relax enough to really fill with the breath. Don't get frustrated, just keep going. 

That alone is a wonderful practice and could be complete in itself!

If you'd like to take it a step or two further, try this:
Shift one hand to your rib cage. Now when you inhale, expand the belly just as you've been doing but then continue that expansion into your ribs and the hand that's there. Feel the ribs move out into your hand. On the exhale, reverse the process. Ribs draw in first, then the belly deflates.

Repeat that several times.

If you'd like to go one last step further, shift a hand to your heart center or center of the chest area, just above your breastbone. Now breathe into the belly just as you have, the ribs just as you have and then see if you can find one last little sip of air under your collarbones. Again you'll exhale in reverse, so the chest releases followed by the ribs and then the belly. Do this for several breaths.

When you're finished, let the breath return to normal for several breaths before you roll onto your right side and come up to sit. Take a moment there before moving on.

This is called three part breath and is a wonderful way to help calm mind, body and spirit when life is a bit tense. You can do this in bed before you go to sleep or even when you first wake up in the morning. If you notice you get a bit light headed at first it should pass, but just let the breath work go if it gets uncomfortable and try again at another time. 

When you finish the practice, pause to notice the difference in your body, mind and perhaps even spirit.

If You Enjoyed This Post You May Also Like…