Two Poses in Ten Minutes for a Simple Restorative Yoga Reset
/2020 continues to be a year of significant stressors for most of us. We're worried about children's education, the stability of our jobs, the state of our country and our environment and it's taking a toll on our physical, mental and emotional health. And we all know, now more than ever, we need to engage with practices that can help us stay healthy and well on all levels. But the thought of trying to make that happen can just add to the overwhelm! When you're too overwhelmed to think straight, it's easy to miss the fact that the greatest effect on our health and wellness can come from simple things done with consistency. Today I want to bring you a simple (and I do mean S-I-M-P-L-E) restorative yoga practice that can help you reset and renew yourself for whatever comes your way next with two poses in just 10 minutes.
Before we get to the practice I just want to say another word about this idea of simplicity. I think it’s something that is SO over looked in our culture. We always seem to make things more complicated than they need to be. Got time in your calendar? Fill it with something! Have one monitor on your desk at work? Why not two! Making dinner? Add six more spices! That will make it better! Some of these things can make our lives better, but often times when we peel away the extraneous baggage we can find ourselves with much more calm and much more ease. I’m finding this to be one of the big takeaways from this time we’ve all been experiencing these last several months. It’s the simple joy of having a cup of coffee with a friend that we miss, not the running here there and everywhere.
So let’s get to relaxing, shall we? You’re going to need a few things:
Props
If you have yoga props, awesome. If not, you can steal from the couch or the bed to make this work. This is not the time to stress about gear. Remember simplicity?! Get yourself a big bolster or pillow and at least two or three blankets. Another smaller pillow can be handy.
Get yourself a nice sounding timer.
Not the kind that makes you jump out of bed in the morning, but one that’s kind of like your Mom gently shaking you to wake up from a nap when you were a kid. There are probably several appropriate sounds on your phone, but if you use that put it on airplane mode. Seriously. The world will be ok without you for 10 minutes.
As I mentioned, you are going to do two poses. Period. You’re going to repeat the first one twice. Here it is:

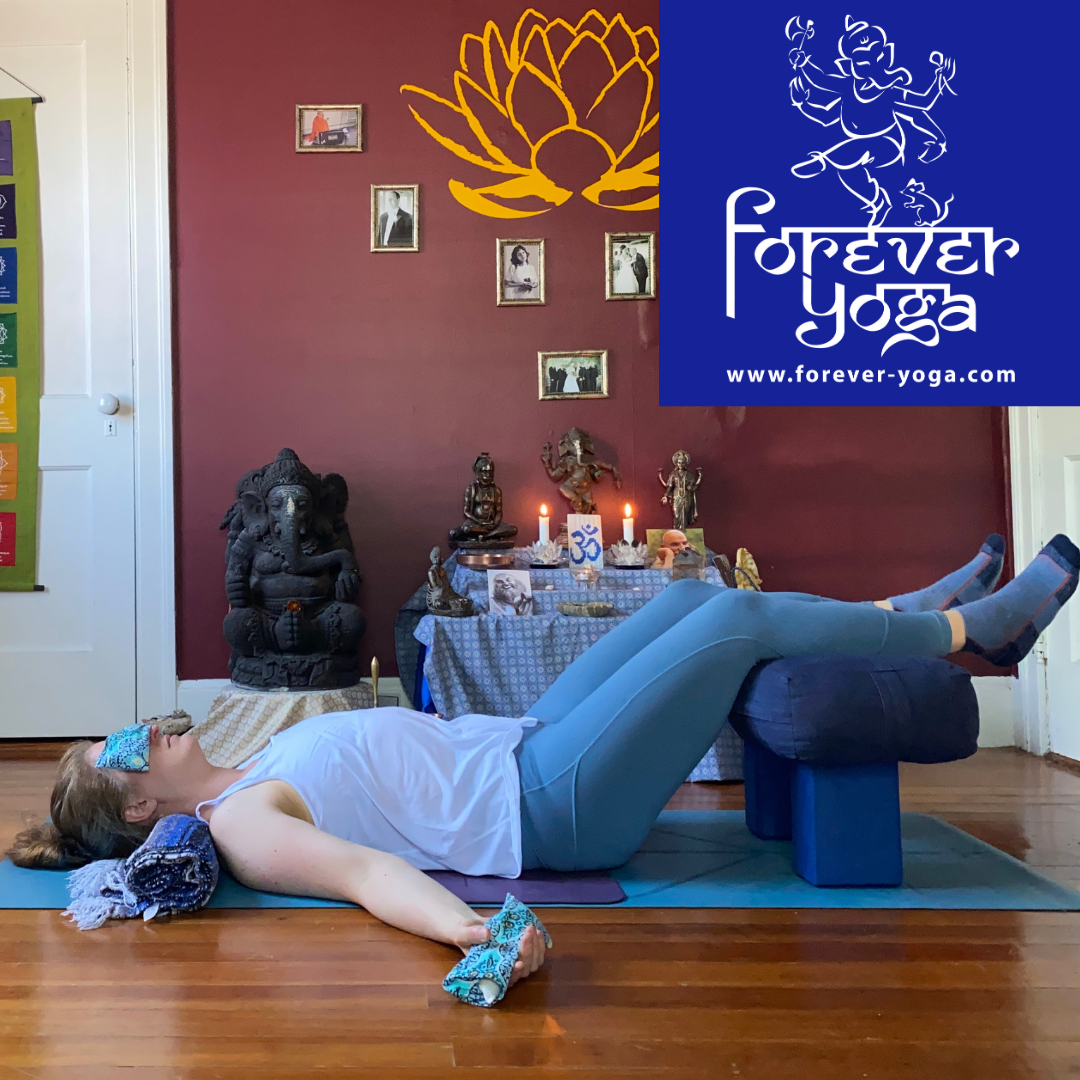
Supported Spinal Twist
I love this supported spinal twist because you not only get the benefits of a supported restorative yoga posture, but you also get a good twist in as well. It may be not be anatomically correct to say so, but twists tend to feel like they wring the stress right out of the body. We tend to hold a lot of tension in our spinal muscles and this pose will help to gently relieve them of that tension.
To find your way into the pose: set up your bolster or big pillows like a ramp. As you can see in the photo, I used one block at the low level and one at the medium level to rest my bolster on. Have a couple of blankets handy on either side of the bolster/pillow ramp. Get that extra blanket or smaller pillow handy. Then sit next to the ramp with your right hip up against it, your knees are bent out in front of you and your thighs are making a right angle to your hips. Place the small pillow or extra blanket between your knees for some extra cushion. Then start to lay your torso down on the ramp with one hand on each side of it. Your forearms should come to rest on the floor but if they don’t, that’s what the extra blankets are for. You’re going to fold those up under your forearms until they rest easily. Your head can face the same direction as your knees or you can turn it to face the opposite way if that’s comfortable for you.
Set your timer for 3 minutes. Breathe deep as you rest here and imagine that your body is getting heavier with each exhalation. It’s like your body is sinking into the floor.
When the timer goes off, press the earth away with your hands to come back to seated. Sit with the ramp behind your back for a moment or two. Then gently swing your legs over to the other side and repeat the pose there. You’ll likely need to adjust the blankets under your forearms if you were using them.
Set your timer for 3 minutes. Breathe deep as you rest here and imagine that any lingering tension is draining out of your body and into the earth where it gets washed away.
When the timer goes off, come back up to seated.
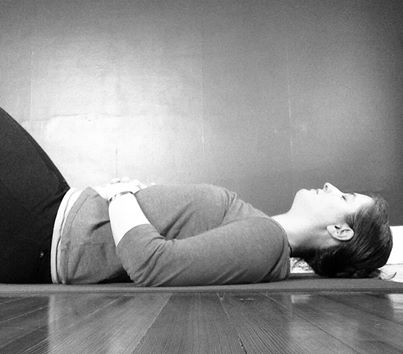
Supported Shavasana
Last pose. Shavasana.
I really like this supported version with the addition of eye pillows in the hands and over the eyes. But that’s complicated. It’s perfectly fine to just lay flat if that works for your body.
Set your timer for 3 more minutes and maybe take two or three more deep breaths that you release with a big sigh through an open mouth. Then, just allow yourself to rest. If your mind decides to run away into the complexities of life, either just let it, or draw some gentle attention back to your breath.
When your timer goes off, slowly find your way to one side, press up to seated and celebrate that you did something really good for yourself today that is going to help your body, mind and spirit deal with everything life is throwing at it these days. You’ll face it all with a little more calm and a little more focus.
Repeat this short restorative yoga practice whenever you remember to do so.
What if I want or need more?
If you find yourself with more time or you’re just wanting to stay a bit longer you might hold each twist for up to five minutes and extend shavasana to 5 or more minutes. If you wanted to add in one more pose, you could add in legs up the wall. (If you have trouble with getting comfortable in that pose, here are some tips.)
Want EVEN more?! I’m teaching another online restorative yoga class via Zoom in October.
Space is limited and I’m only offering a couple of discounted spaces.

If You Enjoyed This Post You May Also Like…